Tuesday, February 7, 2012

1-2-3 Sugar Scrubs!

I've recently been looking into expanding my product lines for Second Spring Soaps, and I finally decided to branch out into the world of sugar scrubs! I've been researching different recipes, from scrubs that you scoop into your hand, to cut cubes, to molded cubes... I finally decided on making my sugar scrub into cubes molded in my small silicone cube pan!

However, I felt a little uneasy about using a melt and pour base. I've been working on the side with melt and pour soap base, because the soaps that M&P artisans make can be absolutely amazing! However, when I tried to make sugar scrub cubes with it, I was less than happy with the results. I guess my cold process soap has spoiled me! Well, a little more research lead me to an invaluable post on the Soap Making Forum, and I am in love with the results! (You can read the original post here!)

Here's the breakdown of the recipe... You will need:
-A shredded soap base
-Oil or Butter (I used olive oil)
-Sugar (white or brown or a mix of both)
-A measuring cup or spoon
-Mixing bowl
-Microwave
-Mold (if you want shapes)
-fragrances and dyes (if desired)

The recipe is simple: 1 part oil or butter, 2 parts shredded soap, 3 parts sugar! The best part about this recipe is that you can make small batches or huge batches by just changing the size of the measuring cup or spoon!

1. Add your 1 part oil to your 2 parts shredded soap. Mix in a few drops of dye if desired.
Dough-like consistency
2. Heat your mix in short bursts until mostly melted. I found that 15-20 second bursts were perfect for my microwave.
3. Add your 3 parts sugar and add fragrance. Stir until the mixture acts like dough.
4. Mold your mix and set it in the freezer for a while. The original recipe called for 5-10 minutes, but my cubes did great after freezing overnight.
5. Remove from mold and let them air dry for a day. Store them in an air tight container.

And voila! You have ready to use sugar scrub cubes!

I also made a YouTube video walking through the sets, just in case you area a visual learner!

Sunday, February 5, 2012

Tutorial: Handmade Massage Oil


Valentine's Day is less than two weeks away! Time to go pick up that same box of chocolates... Or, that pink teddy bear with the heart that says "Wuv Yoo!"... Wait, did you even remember Valentine's day? Dang, time to make a mad dash for a card... Or, you could pick up a copy of Barry White's greatest hits to go along with a big bottle of handmade massage oil, just for that someone special! 

Here's what you will need:
-A carrier oil (grape seed oil is a great one. It's cheap and can be found in most grocery stores. Jojoba, Avocado and Sweet Almond are fantastic, too, and can be found in health food stores or vitamin shops.)
-An essential oil (Classic scents include: lavender, eucalyptus, tea tree.)
-An amber-colored or blue-colored glass bottle with cap (Can be found in some craft stores, but ore commonly found in health food stores in the Heath and Beauty section)
- 1 tsp measuring spoon
-Dropper

My Lavender Massage oil with
1. Measure 4 tbsp of your carrier oil, and pour into your amber or cobalt blue bottle.
2. Using your dropper, drop 5 drops of essential oil into your bottle.
3. Repeat until your bottle is full!
4. Screw on your cap and gently shake your bottle to mix it all together!

You can dress up the bottle with a few ribbons, or a special label printed on sticker paper!

How to use:
-Put Barry White on your stereo ;o)
-Pour a small amount of massage oil onto your hands and run together to warm them.
-Massage away! (avoid sensitive areas, such as the face and, er, private areas!)

Tip:
For a fun twist, use flavor oils, like these found at Aroma Haven for edible massage oil! You can also use edible essential oils, like lemon, grapefruit, or mint, which are commonly found in health food stores, or in the health food section of some grocery stores. 
(Do not use flavors meant for cooking! These are often water-based or alcohol-based, and will not mix in with your carrier oil! It may smell nice, but it will be a hot mess!!)

Happy Valentine's Day, everyone!

Friday, February 3, 2012

The Kudzu Experiment: Out of the Mold

My soap was finally hard enough to take out of the mold 5 days after pouring!! That's a seriously long time, when most of my soaps are ready to take out of the mold after 2 days, but I shouldnt be surprised, since I had over 60% olive oil in these tiny batches.

The first one that I unmolded was the soap make with the kudzu-infused olive oil. The color greened in the mold, and the final result was a creamy green.
The second one that I unmolded was the soap make with the powdered kudzu. It actually took on this really deep, gorgeous green color, similar to a forest green! I'm going to watch this soap anxiously, since most plant add-ins tend to go brown over time (Lavender buds are notorious for this!).

I've been slowly adding videos to m blossoming YouTube channel, and last night, I added a video of me popping out these kudzu experiments... I forgot to mention in the video that I put the molds in the freezer for about an hour before I tried popping out the soap!

Enjoy! Check back in about 4 weeks for another video... My kudzu experiments will be cured, and I'll be trying them out for the first time!

Monday, January 30, 2012

The Magic of FotoFuze


I have been selling online for over a year (my soap shop, and previous shops on Etsy and ArtFire), and I cannot believe that it has taken me this long to find out about FotoFuze!

I was turned on to FotoFuze after visiting the Etsy forums one night... After reading so many rave reviews about the site, I HAD to check it out... And I am SO GLAD that I did!

FotoFuze is a site that works with your photography. I take my images and import them directly from Etsy. I can then highlight the object in my picture, and the site whitens the background! I have heard that it also works great with black backgrounds, but I havent experimented with those yet.

Check out these before and after pics:

Isnt it amazing! The site is easy to navigate, and their tools are simple and quick to use. They even have video tutorials for those of us who are visual learners!

Make sure to check out this site if you sell online. Your photographs will thank you!

Thursday, January 26, 2012

The Kudzu Experiment: (Finally!) Making Soap

It's finally time to make my kudzu soap!

If you need a recap, here are my first and second blog posts on the Kudzu Experiment.

For both batches of soap, I made tiny 3 ounce batches of soap batter. Both batches contained the same oils: olive oil, coconut oil, and castor oil, which makes a mild and bubbly bar of soap.I did not use a fragrance oil or essential oil in either batches.

First, lets take a look at my kudzu-infused oil soap...
For this batch, I substituted my kudzu-infused olive oil for regular olive oil. The oil had a rich, forest green color, but once the lye/water mixture was introduced, it morphed into a creamy green shade. The batter did not a or d (accelerate or decelerate, which is the speed that the batter traces), which is fantastic!
Coconut oil, Castor oil, and Kudzu oil
Mixing everything together!


 Next, lets take a look at my soap with kudzu powder...
With this batch, I waited until the soap batter had reached a medium trace before adding the powder. This ensured that the kudzu did not all sink to the bottom once the soap was in the mold, but stayed suspended throughout the bar of soap. Before adding the powder, the soap batter was egg shell white (a nice off-white, traditionally what I get with this recipe), but once the powder was added, the color changed dramatically to a rich green with dark-green specks. This kind us surprised me a bit, because not all plant additives to soap will change the color throughout, but rather just make the soap speckled.
The powdered kudzu has always had a green tea-like scent to it, and I sniffed this soap in the mold last night, and it retained the smell! I'm very anxious to see if the scent lasts through the cure... Usually, with other plant matter, they dont!
After adding the powder!
Coconut oil, Castor oil, Olive oil


I had a little left over from each batch, so I mixed them together and made two more bars, which will be interesting!
Batch #1 in top, Batch #2 bottom middle, Mixes of the two on the bottom sides


 These soaps will be in the mold over the weekend. Usually, soap can be unmolded in about 2 days, but when I made up this recipe, over half of the oils are olive oil, so the soap will still be soft. I cannot wait to see what these babies are going to look like after their cure!!
I will be posting a YouTube video of the unmolding (yay!), and I plan on making a second video trying out the soap in about 4 weeks, so keep an eye out for those!

Tuesday, January 24, 2012

Are you one of those folks who is dying to try my lip balm, or cannot wait to bathe with one of my sweet, silky soaps, but you do not want to use PayPal as a payment method? Or, do you find using PayPal to run credit cards confusing?

Well, this is your lucky day! I've opened a second shop on a new site called WePay.com! WePay is very interesting... You can shop and pay for your items all at once, without using a separate credit card processor! Awesome! The site is not soley deticated to handmade/vintage, and it is brand new, so it needs all of the love it can get!

Do not worry, I am not abandoning Etsy! I love Etsy and my Etsy shop, but I wanted to give my sweet customers an alternative to Paypal!
Here is my new shop! I will be slowly moving my items over... They should all be live next week!

Have a wonderful evening!

Monday, January 23, 2012

Hydrotherapy: Relax and Soak


Baths are not just for kids anymore! A warm soak in the tub can be one of the most relaxing parts of the day. By adding a few small touches, you can make your soak a true therapeutic experience.

Set the mood!
To really get the best our of your hydrotherapy, set the mood! Lower the lights and light some scented candles or incense. Grab some warm, fluffy towels and set them near the tub. You can even bring your favorite music or that book you've never had the time to read!

When pouring your bath water, try to make it nice and warm, but not hot. Hot water can actually be drying to your skin, and is not healthy for people with blood pressure or kidney problems. A good temperature for a warm bath is right under 100 degrees.

Unscented bath salts and Loofah
Another nice touch to a bath is a scrub with a loofah. A loofah sponge comes from a Mediterranean plant, who's fruit is dried to make the sponges. Loofahs are wonderful at polishing the skin without over-scrubbing! They can be very relaxing. Take your loofah and wash your body in small circles for a relaxing experience! 

One more thing that you can add to your bath to make it even more relaxing are bath salts. Salts, like epsom salts, can be added to relax the body and relieve muscle aches. You can also use commercial or handmade bath salts as well. 

If you prefer a scented bath without the salt, you can add your own essential oils to your bath. Only add a few drops! A little goes a long way with essential oils! Here's some essential oils suggestions:
  • To Relax, try lavender, ylang-ylang, or rose
  • To calm yourself, try chamomile or neroli
  • To invigorate and energize, try grapefruit, lemon, or other citruses

A nice, relaxing bath helps everyone to center themselves and feel refreshed! Give hydrotherapy a try after a long, hard day!

Monday, January 16, 2012

The Kudzu Experiment: Prepwork


Dried Kudzu
Here's the second installment of my kudzu experiment!

My kudzu leaves have been drying for a few (quite a few!) weeks, and they were ready to grind once they became brittle to the touch. A few people I know will grind herbs and other things using a blender or magic bullet, but I prefer to do it with a mortar and pestle.

Grinding the old fashion way!
The leaves were quite easy to grind. I would only work on one leaf at a time, or I had trouble with spilling. Also, when grinding the leaves, be very careful to remove all of the stems, because they will not grind up in the mortar and pestle.
Oh! And the kudzu smelled lovely as it was being ground up... similar to the smell of unbrewed green tea.

Once I had the leaves ground up into a powder, I decided that the best way to experiment with the kudzu would be to use it in soap in two ways: for one batch, I will add the powder straight to the soap batter and for the second batch, I will use kudzu-infused olive oil.


Ground Kudzu
To infuse oil with kudzu (or any herb you wish), you will need:
-A glass jar with a tight fitting lid (mason jars work fantastic!)
-A carrier oil (I prefer to use olive oil)
-A n unsealed tea bag
-About 3-4 tsp of your herb
-A pot (You'll need this to do a stovetop infusion)

You'll start by pouring your herbs into the tea bag and placing the bag in your jar. Pour your carrier oil over top of the bag, and seal up the jar.
After that, you can infuse your oil one of two ways. The traditional method is done using natural sunlight. You will need to place your jar in a window that gets lots of warm sunlight. The infusion will take about 6 weeks to completely finish.
Infusing: Stove Top Method

The second way is to do a stovetop infusion. You will place your jar in a pot with water, and place it on a low heat for a period of between 6 and 8 hours. The infusion will be sped up by the heat. Make sure to check the pot periodically and add water as it evaporates. Make sure to never leave your stove unattended, or leave the house with your stove on! Safety first! Your jar will be hot to the touch when it is finished, so take care when handling. Make sure to let your oil cool before using it.
Kudzu-Infused Olive Oil

I will be making my two kudzu soaps soon, so stay tuned to see how they turn out!

Monday, January 9, 2012

New Supplies for January!!

Translucent Lip Balm Tubes

For my birthday this year (I celebrated my 28th on January 2nd!), my husband gifted me with a supply order for my shop! Best. Gift. Ever!

The very first thing that I grabbed up was a set of translucent lip balm tubes with caps, as well as tamper-evident wraps for the finished product. Since I started making lip balms, I've had a few people (my sister was the most vocal!) who have asked for tubes instead of tins. So, I obliged!

Next, I knew that I wanted to add to my lip balm line with a new, fresh flavor. I wanted to pick one that was different from my other flavors... So, I chose this fantastic Cherry Berry! It smells like sweet, tart cherries, with a mix of strawberries and blueberries. To make the lip balm perfect, I am going to tint the balm with either a rosy pink or a nice red.

New Fragrances and Flavors! Yum!
One of the great things about ordering from Rustic Escentuals is that when you order more than $15 in product, you get the option of picking out two 1 oz. Fragrance oils for free! When choosing my fragrance oils, I decided to go a more masculine route and picked Green Irish Tweed and Lumberjack. Green Irish Tweed is a classic cologne scent that smells sweet and musky. I felt pretty confident about the GIT, but the Lumberjack was a bit more of a leap-of-faith. And I am so glad I took that leap! The Lumberjack scent smells amazing! It is very woodsy, and reminds me of a fireplace burning pine logs with a hint of sweet floral undertone. It was a fantastic leap of faith!

The single best thing about Rustic Escentuals is their amazingly quick shipping! I ordered from them early monday morning, and my package was in by wednesday! And their customer service on their facebook page is some of the best that I have ever encountered!

All in all, I am silly excited about my birthday present! I cannot wait to get started on some great smelling men's soaps and some berry awesome lip balm!

Happy creating, dolls!

Wednesday, January 4, 2012

Many roads with one destination: Soap!

Cold process soap... Hot process soap... Melt and Pour soap... CP Oven Process Soap... Handmilled... Rebatched... Wow, there sure are a lot of soap making methods out there! When shopping for that perfect bar of soap, what does all of this mean?

Well, all of the above are methods for making soap... each one is a little different from the last. Today, I will break down the top 3 methods for soap making, as well as their benefits: Cold Process, Hot Process, and Melt and Pour.

I'll start first with the method I use most often: Cold Process. The cold process method involves mixing a water/lye solution with various oilsat a temperature of between 100 degrees and 90 degrees. Once the soap batter reaches trace (or, becomes the consistency of thick pudding), scents, dyes, or other additives can be added, then the mix is poured into a mold. The soap is safe to use once it has cured (or, set out of the mold to air dry) for approx. 6 weeks. The long cure time allows for the lye molecules to react with the oil molecules to form glycerin, which is the cleaning agent in soap. This reaction is called saponification!
Cold process bars of soap are well known for their creamy, solid bars. I prefer the CP method over the others because I like the instant gratification of seeing (and smelling) my soap, as well as the anticipation over the cure time before I can test the soap myself!
CP soap (and HP soap) has the benefit of being made from all natural ingredients. Some synthetics can be added to the soap in the form of fragrance oils and dyes, but scary synthetics (like propylene glycol) are often left out.
You can find photographs of my soap making process here on my facebook fan page! My etsy shop is full of cold process soap, and here are more Etsy soap makers featuring CP soap!!

Hot process is another popular method for soap making, and it is quite similar to cold process. With the HP method, soap makers use the same lye mixture and the same oils, but they speed up the saponification of the lye and oils by adding heat to the mix! The oils and lye mixtures are added together in a crock pot or similar heating source, and are essentially cooked over a period of hours. The heat encourages the molecules to form glycerin faster, and the soap made with the HP method is ready to use almost immediatly! (The HP soap makers that I am familiar with still like to cure their soap for a short period, to ensure that the lye is completely gone.)
Hot process soap is often identified by its rustic, rough look. When the soap is ready to go into the mold, it often has a very thick consistency and has to be spooned into the mold, rather than poured. This can lead to air pockets which give the soap its signature look!
Check out this link to Etsy to view some amazing HP soaps!!

Melt and Pour soap rounds out the top three when it comes to soap making, and it is often the method that most soap makers start out with. M&P is essentially safer for the soap maker, because instead of working with caustic lye (very dangerous if handled improperly!), M&P soap makers are working with premade bases, which can be headed up and poured into various, intricate molds. Melt and pour soap makers can make some amazingly beautiful creations, and melt and pour soap can be added to CP soap or HP soap for an added burst of color.
To make M&P soap, just head to your local craft store! Most craft stores sell premade bases that can be melted down, as well as the colors, fragrances, and molds needed to make your soap your own! The downside to the craft store kits lies in the list of ingredients to their soaps... if you are looking for a more natural base, there are many vendors online that can help!
Check our this link to Etsy to view some gorgeous M&P soaps made by amazing artists!

Comment if you are interested in learning more about soap making, or contact me on my facebook fan page... I love to talk soap!

Monday, January 2, 2012

Tutorial: Homemade lollipops

Today is my birthday!! I just turned 28 (oh man!), and I figured that a great birthday present to you all would be a new tutorial! So... lets make some lollipops!!

You will need:
2 cups Sugar
2/3 cups corn syrup
3/4 cups water
flavoring (LorAnn's flavoring is fantastic!!)
Lollipop sticks
Lollipop mold (or, you can use a greased baking sheet)
Candy thermometer

1. Mix together the sugar, water, and corn syrup in a pot on medium heat. Stir until the sugar is dissolved.
2. Bring your pot to a boil. Dont stir!! (This was hard for me... I am a chronic stirrer!)
3. If you want to add coloring, add it when the mix is about 260 degrees. Just toss it in. The boiling will stir it in.
4. Turn the head off when the pot reached 300 degrees (This is called the hard crack stage on a candy thermometer). When the boiling stops, add your flavoring and stir it in. (Yay! we get to stir!)
5. Pour the candy into your mold, add your lollipop stick, and twist the stick to cover it with candy. (If you are using a baking sheet, you can either draw circles with the candy and add sticks, or pour it out, then score it with a knife).


Once the candy cools, enjoy!!
Hint: You can use kool-aid packages to flavor your lollipops, but take care not to burn the sugar! Burnt kool-aid lollipops taste horrible!!

Dress up your lollipops with a cellophane bag, a sticky label, and a bow, and you've got a great looking gift!

Happy candy making! And happy 28th birthday to me!

Saturday, December 31, 2011

Happy New Year from Second Spring Soaps!!

2011 is almost over, and 2012 is almost here! That's quite a few almosts!

Tonight, me and my family are staying home, just the three of us. We're going to have a big dinner of chicken and stuffing, and pie for desert, then we're going to stay up and watch Anderson Cooper on CNN! It will be a small and simple celebration, but it's the way we want it! Plus, my toddler seems to be getting excited, since we've been telling him about the party tonight!

2011 was a fantastic year for us! My son turned 1 back in July, my husband began his pathway program through King College and is on his way to graduating in August of 2012, and I officially started my soap shop in September! Lots of milestones! We are all very excited to see what will happen in 2012.

Happy New Year!! How will you be celebrating tonight?

Tuesday, December 27, 2011

2012: A Preview of What's Coming

2012 is coming soon! How exciting! With only 4 days left in 2011, I thought this would be a great time to talk about all of the fun and exciting things coming up for Second Spring Soaps!

Right now (yep! right now!), I am prepping for both Valentine's Day and St. Patty's Day. A few weeks ago, I made some new two-colored soaps in great scents (lilac, honey/almond, oakmoss and sage...), and they will be going live online in just a few days! I've picked up some new yarns as well, for some crochet swag to go along with the holidays!

Oh, and debuting just in time for St. Patrick's Day... Beer soap! Beer soap is made with beer (no way! really?) for some great additions for your skin (barley, hops), but with no beer smell! So, dont worry, you wont be heading to the office smelling like you are coming off a bender.

Exciting news in the world of lip balms!! After many requests (a lot of them from my own sister), I am transitioning from round tins to the traditional lip balm tube! Whoo!! I'll also be adding lots of new flavors, such as a triple berry blend, peppermint, clove, lemon, and (drum roll, please!) chocolate!

There's even more surprises coming... new bath salts, new crochet accessories, and the addition of bath bombs!

Happy New Year!

Wednesday, December 21, 2011

Social Media and the Small Business

I had my second of two classes at the Tennessee Small Business Development Center at ETSU today, and our subject was all about using social media! Social media has quickly became a dominate force in our lives... I mean, think about it... How often do you check your facebook? (I'll admit, I check mine often!) Small businesses can use social media to their advantage, if they know what they are doing!

We talked about 5 different social media sites: facebook, twitter, foursquare, linkedin, and youtube. Now, I am already on facebook and twitter, but I was very interested in the other three, as well as learning how to better communicate to (and with!) you guys through the sites.

One thing that I am very interested in is creating a YouTube channel! Back when I was really getting into the art of soap making, I would search youtube for hours, and was very inspired by other soap artists who posted videos of the soap making process, as well as follow-up videos once the soap was ready to cut!
So one of my goals in 2012 is to start a YouTube channel featuring my soaps! My husband and I are currently tinkering around with his iphone's video capabilities, as well as my own camera, and I want to start shooting and uploading videos by January or February! That way, you guys can get sneak previews of what will be coming up in my shop!! :oD

One interesting note that I learned today was the different in posting on Facebook and posting on twitter. On facebook, I try to only post once or twice a day, so my posts do not jam up everyone's newsfeed, so I was doing the same on twitter... Nope! I was doing it wrong! I learned that on twitter, people post more often in order to be seen in the real time feed! So, if you follow me on Twitter, look for me to start posting more often!

And of course, I'll still be on facebook! I love linking my blog to facebook, talking about new products, and uploading photos! Look for more polls and questions about what YOU want to see in new soaps and lip balms, as well as peeks into new products that I am developing for 2012!

Remember, to catch great (free!) classes like this one, and the one I went to a few days ago, contact your local SBA chapter! New classes start up in Tennessee in January, and I am looking forward to taking a few more!

Sunday, December 18, 2011

Just some light reading...

Well, my semester is over! Four more classes are now behind me, and I am 12 credit hours closer to graduation!

My goals for winter break are ready to be fulfilled... I've got to finish some last-minute handmade Christmas gifts, make loads of cookies and candy, I'm planning on making new crochet wash cloths and soap savers with men in mind, I've already started creating heart-shaped soaps for the valentine's holiday, and I picked up some light reading from ETSU's Sherrod Library!


I grabbed two books. The first is the "AMA Complete guide to small business marketing." This boo seems great, and has lots of space for interaction, quizes, and self-reflection. The second book is "Successful Marketing for Small Business." I am already in love with this book! When I first opened it and started reading, I realized quite quickly that this was a book I would be taking notes from!

What great resources!

What are you doing over winter break?

**PS: If you are interested in purchasing from my etsy shop for holiday gifts, make sure to do so by tomorrow!!**

Wednesday, December 14, 2011

A little help for the budding entrepreneur...

My fall semester of college is getting ready to end (only two finals left and I am free for a month!!), and one of my favorite things to do each week is to grab a copy of our school paper, the East Tennessean. And I bet you can imagine my excitement when I read that the TSBDC is offering training classes for small businesses!

Wait... what is the TSBDC?
It is the Tennessee Small Business Development Center, which is associated with my university AND the SBA! They offer courses and counseling for people who run, or want to run, small businesses. They are also associated with ETSU's college and business and technology!

Well, I called and immediately signed up for two of their courses (I cant take the others because of my silly finals! Dang!). I attended my first of two yesterday, called "So you want to start a small business." I was so pleasently suprised by the class! It was a small class (I was one of 9... and I think I was the youngest there!), and our instructor was friendly and encouraged an open forum... The open forum was fabulous! I was able to ask about getting my sole proprietorship in Tennessee, even though the majority of my sales are out of state.

We also got some cool swag!
We were able to keep the small business workbook, which came with invaluable information, such as local phone numbers, steps to filing paperwork, and help with attempting to get small business loans from banks!
My swag also included a yearly calendar (this is going to be great for tracking my mileage!), a magazine about computers (an interesting read if you are looking to upgrade your devices), and a pamphlet from Google on how to best use Google to your advantage!

So, for all of my budding entrepreneur friends out there, looking to start up their own small businesses, make sure to check out your local SBA branch for classes! My two classes were free to attend, and I gained some very valuable information, as well as getting an opportunity to network!

My second class is next Wednesday, and we will be covering social media... So remember, you can like me on facebook, as well as follow me on twitter! ;o)

Wednesday, December 7, 2011

What's in a name?

A few weeks ago, I was talking to my Mom about my soaps and showing off my shiny business cards from Vista print, and she asked me "Why Second Spring Soaps?" (... then she made a joke about my soaps sounding "second-hand," but that's neither here nor there!)

So, I got to thinking about it... maybe others out there are curious as to why I chose this name for my soaps!

"Second spring" actually comes from a quote I stumbled upon over three years ago by French philosepher Albert Camus. The quote reads:
"Autumn is a second spring when every leaf is a flower."
I fell in love with this quote! I honed in on the words "second spring:... They spoke so softly to me... At the time, my husband and I were dating... We actually met when we were 7 and in elementary school together, but my parents and I moved away when I was 10, and we had just re-met and fallen in love about 4 months prior. I had been married previously, and I looked at my new life and new marriage to my husband as my second spring in life... my new shot!

So, I clung to the name for over a year. I've always wanted to make my living by creating things with my hands, and a friend directed me towards Etsy.com. After a few ideas at shops, one of which included knitted items (never got off the ground) and hemp jewelry (I worked hard for 6 months before deciding to rethink my shop), I finally settled on soap making, and Second Spring Soaps was born!

Thursday, December 1, 2011

Christmas Market in Johnson City, TN

Big announcement!!

I will he heading to the Johnson City Farmer's Market on December 17th to sell at their Christmas Market!!

Here's a link to their web page if you are interested in learning more about them.
And make sure to go and "like" their Facebook page to get updates!

I am a huge supporter of our local farmer's market, and my plan is to be a full-time seller next season, starting in May! So, I am super excited about the Christmas Market... I am calling it my "test run!"

So, if you are in the area between 9am and 2pm, stop by and check out all of the wonderful handmade goodies made by local crafters ad artisans! And say "HEY!" to your favorite soapy gal! ;o)

Sunday, November 27, 2011

Thanksgiving Weekend

What a nice, relaxing holiday weekend we have had!

My husband, son, and I have lounged about for most of the weekend... We spend Thanksgiving day with both of our families... My in-laws for lunch, and my parents for dinner! My sister-in-law was in with her adorable family, and Benjamin (my little kiddo) got to sit at the kids table for the first time!

And yes, that is my niece on the right in a bikini top and pajamas... she was a mermaid for Thanksgiving! Love those girls so much!!

We also found out that one of my cousins is expecting a baby in May! Another new baby to add to this mix!

In soap/Etsy news, my Black Friday/Cyber Monday sale is still going on, and will be active until Monday at 11:59pm. Make sure you stop by my shop to check out all of my stock at 20% off (and all of my fall-themed stock at 35% off)!

Have a wonderful week, darlings!

Sunday, November 20, 2011

Sales? Where? >.>

Hello, everyone!!

This year, I will be holding a HUGE sale in my soap shop!!

From 11/25/11 (Friday) through 11/28/11 (Monday), everything in my shop (!!) will be 20% off!

That includes all of my fall leaf sets and pumpkin sets... I've discounted them to 15% off, but over the black friday weekend, they will be 35% off!! Wow!

So, remember to think of me when doing some holiday shopping!

<3

Saturday, November 12, 2011

The Kudzu Soap Experiment: Background

Kudzu... Anyone who has ever driven around in the south can tell you that kudzu is everywhere down here! It can be seen on roadsides and in fields, covering everything in its path with a mess of vines and leaves and flowers. It suffocates other plants as it crawls over them, and can grow very quickly.

Now, most people that I have spoken with consider kudzu to be a nuisance plant, something that needs to be cut back every now and then... However, when I was a kid visiting my grandparents in northern Mississippi, I learned that people made jelly out of kudzu! As a kid, I thought Wow, how amazing! And as I grew older and grew craftier, I began to rack my brain about how to use this seemingly-useless plant.

And, a few weeks ago, it hit me... SOAP! Kudzu is supposed to have wonderful medicinal properties, and is used frequently in Asia to help with ails, so why cant I use it in soap?


I started off by picking a few vines of kudzu a few weeks before our first frost hit, and I dried them in the darkest part of my closet. Now that they are dry and good and crunchy, I will be grinding them down into a powder to be added in my basic soap base...


Look for pictures coming soon!

Happy Crafting!

Sunday, November 6, 2011

Soap Preview: November 2011

I have loads of awesome soaps coming up! I just thought I would take a moment to let you all in on my goings-on, and get a sneak preview of what will be new in November!

This delicious-looking soap cupcake is scented with warm vanilla and topped with pink and blue soap sprinkles! (And there's a hint of sugar for a bubbly kick!)Our traditional lavender soaps are now in heart shapes! They come with embedded lavender buds and are a beautiful, pale purple color.I have more soaps sacks debuting this month, including this lovely brick-red soap saver! (It is photographed with a decadent bar of Japanese Pear and Ginseing soap!)And last but not least, here is my lovely cream and green bar scented with the refreshing scent "da Lime in da Coconut"! It will make your mouth water!
------
Make sure to check out my etsy shop this month for all of my new items, as well as gift bags for the holidays!!

Wednesday, November 2, 2011

This Holiday Season...


Just wanted to remind everyone that buying local and buying handmade helps to support local businesses, keeps taxes in your local economy, and helps to support real people!!

Much love!!

Tuesday, October 18, 2011

Homemade Toothpaste

My son is now 15 months old! He is walking, talking (his favorite words are Mama, Dada, duck, and uh oh!), and he just recently popped his first molar. Now that he is popping teeth in earnest (he is up to #11 with three more coming in), my husband and I are getting concerned about his oral hygiene. Before now, we would hand him his toddler toothbrush and watch as he chewed away on it, mimicking us as we brushed. We always made sure to give him water after juice or other sweets to rinse his mouth... But now, we want to start really brushing.

However, my husband has some concerns about fluoride found in toothpaste and in our city's water supply. For the most part, our son drinks spring water or breast milk, but we are wanting to eliminate fluoride as much as we can.

So, I've done a bit of research, and today, I made our first batch of homemade toothpaste!

Here's what you need to make your own:
-1 cup baking soda
-1/8 cup fine salt (You can leave out the salt if you want. I have seen other recipes call for 1/4 cup of salt, but I found that to be a bit too salty.)
-water (enough to give the mix a paste-like consistency)
-flavoring (a baking flavor, like peppermint, cinnamon, strawberry, lemon, etc.)

Combine your ingredients and store them in a clean container with a seal. Rubbermaid food containers work well, and are cheap! I found a nice, glass container with a seal lid for under $2.

In the end, you will have a liquid paste (about the consistency of glue) to brush your teeth with! It will not be foamy like commercial toothpaste, but it cleans sooo well and leaves your mouth feeling really fresh! The baking soda naturally eliminates odors in your mouth! Just make sure to use a soft-bristle brush...

Now I am not worried about my son swallowing toothpaste anymore! :oD Plus, we are lowering our impact on the environment by using a product without any unnatural chemicals and we are not producing any waste from the traditional toothpaste container and box. Bonus!!

Happy Creating!

Friday, October 14, 2011

Know your Oils: Olive oil

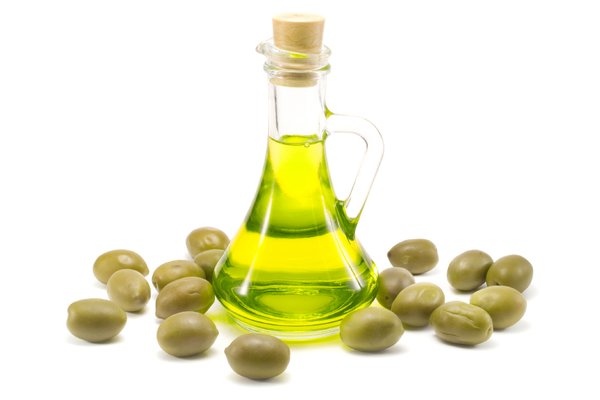
Olive oil! Everyone knows olive oil! A staple in the culinary world, the production of Olive oil is said to have began as early as 3500 BCE! Even Homer, the famous Greek behind The Odyssey and The Iliad is said to have called olive oil "liquid gold." The oil is extracted by pressing olives grown in the Mediterranean region of the world, and is used in cooking, soap making, and religious ceremonies!


Image courtesy of itsfordinner.com

Olive oil is an excellent base for soap, and is the main ingredient in all of our soaps! Olive oil creates a mild bar of soap that is good for all skin types. Some people even bathe their babies in pure olive oil soap due to its mildness! It is said that olive oil based soaps are excellent for helping to repair skin damage caused by wind, sun, or environmental hazards (like smoking and pollution).
Olive oil is also an excellent cleanser! I mean, soap is there to get you clean, right? Olive oil will adhere to dirt, which can be rinsed off, getting you cleaner! And olive oil will not clog your pores as it cleanses!
Olive oil is common in beauty regimens. Olive oil can be smoothed onto hair to create shine!

All of our soaps contain a base of olive oil, and we are working on a formula for castille soap, which is pure 100% olive oil! Make sure to check out my Etsy shop to see my olive oil based soaps.

For more info on olive oil, check out:
The Olive Oil Source
Olives 101

Happy Creating, everyone!

Tuesday, October 11, 2011

Why Handmade Soap?

I am sure that many of you who stumbled onto this blog must be thinking, Why should I use handmade soap? My commercial soap is just as good!

Well, I am here to tell you why!

Handmade soap is amazing! It is made using real oils, butters, and waxes, so you know that the stuff you are rubbing on your skin is natural! And when lye (sodium hydroxide) is added to these oils, a chemical reaction takes place that turns the oils into glycerine!

Wait, what? Your soaps have lye in them! I know what lye can do to someone! I've seen Fight Club!

Actually, once the chemical reaction takes place, and the soap has had ample time to cure, the lye is gone! All that is left is the byproduct, glycerine, which is a natural cleanser!

But, my soap from the store is working just fine.

Actually, did you know that most commercial "soaps" are actually not soap at all? If you look closely on most labels, your "soap" bars are actually called detergents or washes. These cleansers actually use synthetic chemicals to clean the body, rather than natural glycerine. In fact, most cleansers start off with glycerine, but the glycerine is removed! And most commercial cleansers contain paraffins and petrolium byproducts, which can be harmful to sensitive skin. In fact, doctors and midwives are now starting to sugest that pregnant women avoid cleansers with chemicals in them, like paraffins and propylene glycol.

So, now what?

Well, look into handmade soap! Always make sure to check the labels for products that might be irritants or cause allergic reactions. For instance, I have some soaps that are made with sweet almond oil. Folks allergic to almonds may need to steer clear! Handmade soaps can also contain colorants, both natural (like cocoa powder or parsley) or synthetic (such as micas or dyes). Scents can range from fragrance oils (synthetic) to essential oils (plant derived). (Caution: always check out a fragrance oil before using it! Certian ones can cause bodily complications! For instance, citrus EOs are known to make the skin more sensitive to the sun's rays, and rosemary EO is supposed to be avoided by folks with blood pressure problems!)
And many folks with various skin conditions, from mild sensitivities, to eczema and psoriasis have found that handmade soaps made with natural ingredients have helped ease their symptoms!

For more information on the benefits of handmade soap:
My Health and Fitness.com

Sunday, October 9, 2011

Craft Tutorial: Feather Quill Pen

For years, I have always loved the idea of writing letters and cards and poems with a real feather quill, dipping the ink in an ink pot and scribbling away... And I finally made it happen! I made my own feather quill!

Do you want to make one, too?
Then good! You are in the right place!

Supplies:
A feather (I used a big fake one from my hobby store.)
A quill nib (found in the calligraphy section, near the paint supplies)
Electrical tape
Ribbon
Scissors
Pliers
Hot glue gun with glue sticks

1. I first started by measuring out my feather's ends to "feel" like a pen in my hand, which turned out to be about half of the wire at the end. I folded it over using the pliers and used the electrical tape to tape the ends together.

2. After wrapping the tape down most of the wire, I attached the quill nib with hot glue and wrapped over the top with more tape.

3. I wrapped the tape over the wire about 3 more times to get the approximate thickness of a regular pen.

4. Using hot glue, I wrapped my ribbon over the tape.

And that's it! Super easy, and the pen works great! You can find loads of ink in a variety of colors in your local hobby store, or you can buy ink on Etsy! Here is a store that sells scented ink... Guess who might be getting some of it in her stocking at Christmas?!? :o)

Happy Crafting!

Friday, October 7, 2011

Know your Oils: Cocoa Butter

Photograph by AgricultureSouce.com

Cocoa Butter has been around a very long time in the culinary world as well as the cosmetic world. Cocoa butter is one of the main ingredients used in both milk chocolate and white chocolate. It is completely edible, and can be used in baked goods as well. The natural form of cocoa butter is a creamy color and has a slight chocolate smell to it!
In the world of cosmetics, cocoa butter has always been reccomended for pregnant women to help reduce stretch marks. It's also found in lip balms and products used to heal dry and cracked skin. It is a fantastic moustiruzer, and a pot of it can last for years!

When used in soap, cocoa butter helps to add hardness to the bar, as well as creamy lather when used. Its lovely moisturizing property can be found in soap when used to superfat, and it helps to create a barrier between the skin and the envorinment. And in regular cocoa butter, the cocoa smell will sometimes come through! Yummy! (Unscented cocoa butter can be found as well!)

You can find cocoa butter at most stores, but I buy mine from my local health food store. I actually try to look for the "Fair Trade" logo on most special oils that I buy. "Fair Trade" simply means that companies are committed to buying products (like cocoa butter and palm oil) from developing countries at fair prices. Fair Trade is also applied to other items, like fruit, wine, coffee (probably the most well known fair trade product), and gold, among others.

As of this writing, I have only used cocoa butter in one soap, which is currently in the "curing" stage. In the curing stage, cold process soaps are losing water and becoming hard. This soap (see right) was made with cocoa butter, colored with cocoa powder, and is scented with a fragrance oil called "Chestnuts and brown sugar", which is a sweet, rich, warm smell that goes along perfectly with the undertones of cocoa!

Happy creating, everyone!!

Thursday, September 29, 2011

Know your Oils: Coconut Oil

Coconuts are great in pies, cakes, pina coladas, and perfect for making radios on deserted islands, but did you know that Coconut oil has tons of benefits for your skin?
Coconut oil has been used as a moisturizer for the skin, scalp, and hair for centuries. It can be used to make hair shine, and straight oil can be massaged into the scalp to help relieve dandruff!

When used in soap, coconut oil is beneficial by making the bars hard. The coconut oil in my soap usually consists of around 30% of the total oils. Some people find that higher percentages of the oil tend to be drying, but lower percentages can be moisturizing! Coconut oil usually consists of 100% of the oils found in salt bars, because this amazing oil can actually create suds in salt water!

Coconut oil, which is found in the bakery isle of your local grocery store, is also excellent to cook with. It can be used to grease, cook, and fry, and can be beneficial for people with sensitive digestive systems. When ingested, CO aids the body by helping with the absorption of minerals! This helps strengthen the bones and teeth. It is also a healthy and economic alternative to cooking with animal fats, and is a good substitute for people looking to lose weight.

For more information on coconut oil, check out these sites:
LiveStrong.com
Natural-Soap-Making.com


All of my soaps contain coconut oil, and it even makes up 30% of the base of my lip balms! Check out my shop to see my products!

Friday, September 23, 2011

Know your Oils: Jojoba Oil

Psst! I am starting a new series called "Know your Oils", where I talk about the properties of the beneficial oils I use in my soaps! Tune in weekly (Thursdays or Fridays!) to learn about how your skin can benefit from these amazing, earth-based soaps!

***

One of the ingredients that I find myself using a lot in my soaps is a wax called Jojoba oil. Pronounced ho-HO-ba oil, the liquid wax comes from the jojoba shrub in warm climates like Southern California and Mexico.

Jojoba oil has many benefits to human skin. Jojoba absorbs well into the skin, and is a fantastic moisturizer. Jojoba will not irritate the eyes, so it is safe to use the plain oil as a make-up remover! Jojoba can be found in shampoos, lip balms, and lotions! I like to use it in my soaps because it will not go rancid after a period of time, and is one of the more stable oils on the market. I usually add my jojoba oil towards the end of the soap making process as a superfat (extra oil not consumed in the soap-making process).

For more information on Jojoba oil, check out this website!
You can buy Jojoba oil at most health food stores, and at vitamin shops.

I currently have a few soaps on the market which contain Jojoba oil... Make sure to go check them out!

Unscented Tallow Soap with Jojoba Oil, in Purple, Green, and Yellow

Set of 3 CP Soaps, Fall Leaves scented with Apple and Mint jelly, Vegan

Happy Soaping, everyone!

Tuesday, September 20, 2011

Soaping Corner and Soap Preview

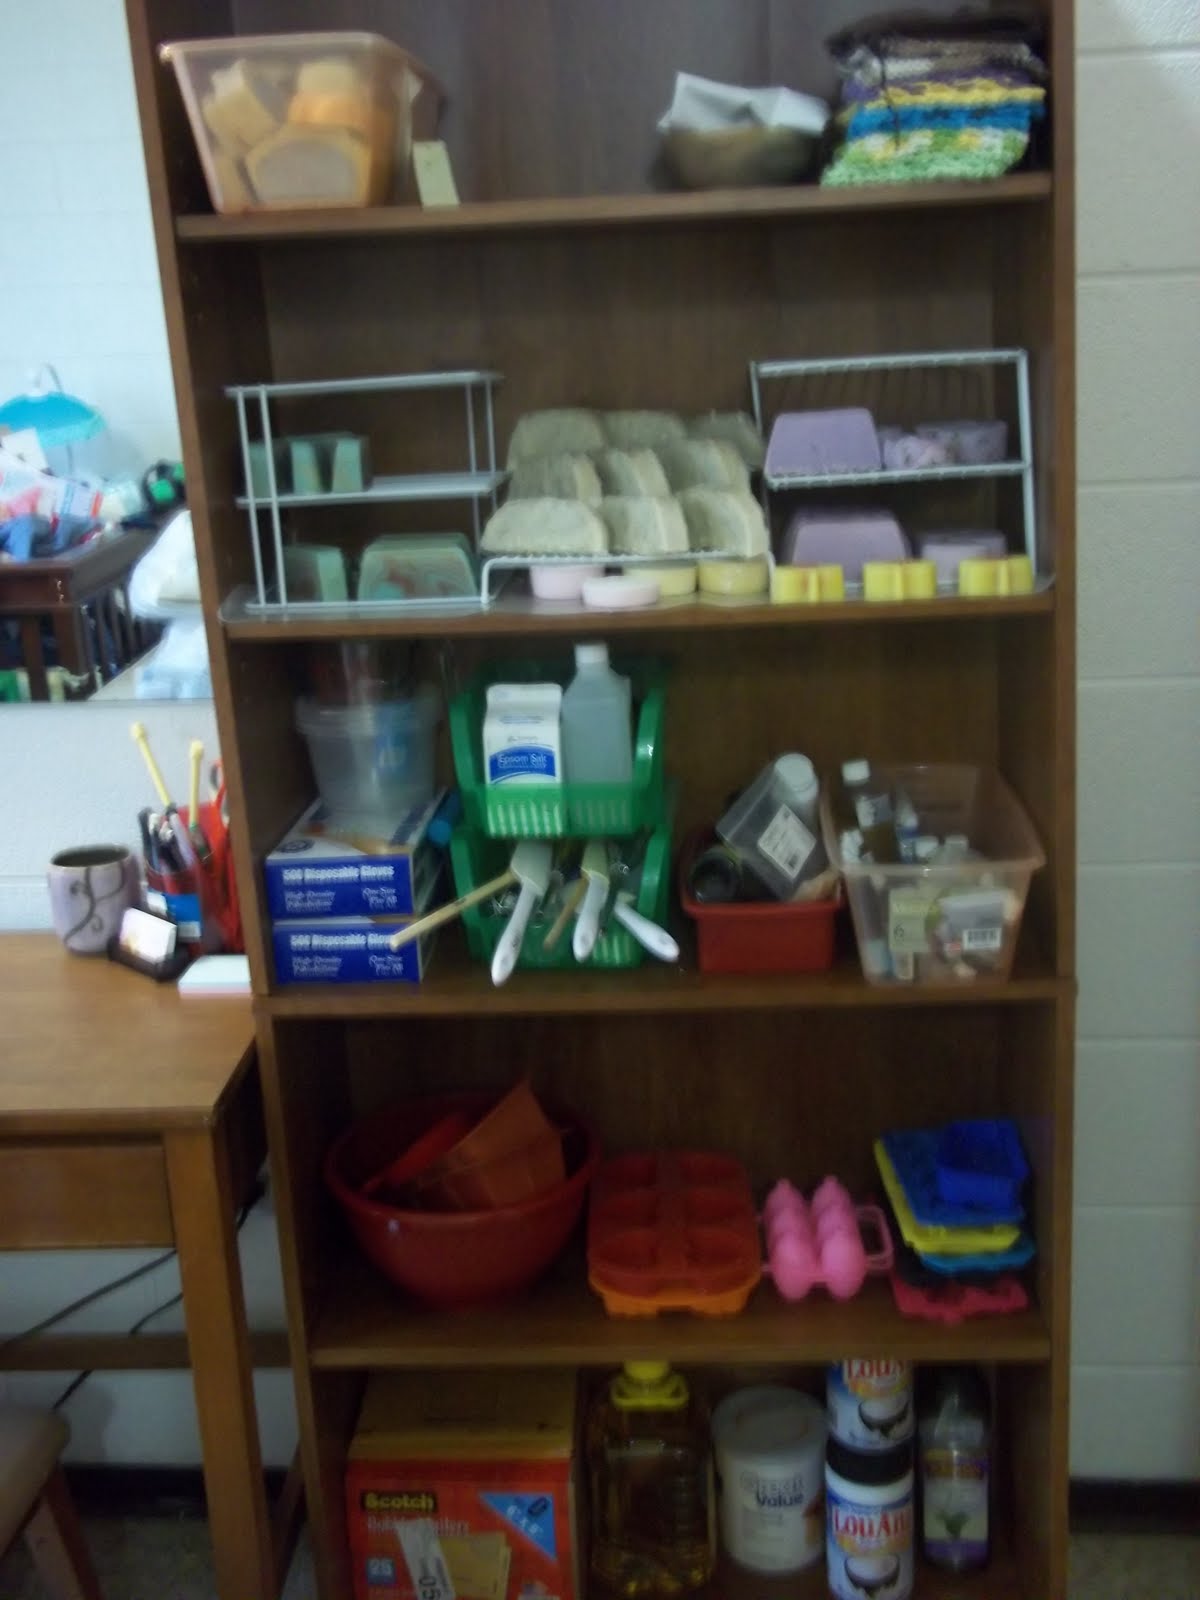
I've always had a crafting desk in my apartment, where I (tried!) to keep all of my crafting supplies and finished products... but when I began preparing in earnest for my soap shop, I quickly outgrew my little desk! If you came into my place, you wouldnt see a kitchen table, but storage for totes of supplies, fragrances, and oils. You wouldnt see a miniature bookshelf, you would see two or three batches of soap curing in their molds. And you definetly wouldnt see my crafting desk, but you would see soaps curing by the dozens!

So, after much brainstorming, my husband and I set out for shelving for my crafting corner...

And here's the results!

On the top shelf are my soaps ready to wrap and photograph, and my finished crochet projects.
Farther down are soaps that are curing. I found these excellent kitchen shelves at Wal-mart, and they are wonderful for making my tiny space a little larger!
In the middle are my soap gloves, my utensils and sharp objects (gotta keep them out of baby's reach!), my additives and herbs, and my fragrance oils and dyes.
Towards the bottom are my molds and mixing bowls (my toddler has already discovered them and has learned that he can throw them around!).
And on the bottom shelf are my large bottles of oil and my shipping envelopes.

And here's a sneak preview of soaps to come!

On the left is my batch of rosemary and patchouli soaps, which I colored green and brown using a column swirl.

In the middle is a batch of hand-molded vegan oatmeal soap.

And to the left is a batch of vegan lavender soap, with lavender buds embeded in it! (And you can see some more fall leaves curing as well.)

Look for these awesome soaps on sale in my Etsy shop in about a month, once they are ready to use!

Hooray for breathing room in my craft space! Happy creating, everyone!

Monday, September 12, 2011

Second Spring Soaps on Etsy is LIVE!

What a first day it has been! I have posted 20 listings (and let me tell you, those listings were tedious, especially while juggling a toddler!), I have all of my photos ready to go, the soaps are weighed, and all of my hard work and perperation over the last three months is finally paying off.

And on my first day back at Etsy,my shop already has 51 views (!!) and I was featured in 3 treasuries!! Wow, what a welcome back!

If you have a moment, take the time to go see these three fabulous treasuries, and visit some other artists and view their work.

Leaf on Fire, curated by cielorosa

A Squeeze of El Limon, curated by kittyloobg

Fall Leaves, curated by ElvenGrove

I just wanted to take out a moment to thank these wonderful artists for featuring me!! Whoo! What a great first day back on the job!

Sunday, September 11, 2011

Etsy and Relevancy

Although I have been absent from the Etsy scene over the past few months while preparing to open my bath and body shop, I have tried to stay current on any changes that the Etsy staff, and its new CEO, have been making. One of the big changes was to searches, making "Relevancy" searches the default search, instead of "most recent", the old default search.

I decided to compile a list of tips from other Etsy members that have helped their items appear higher on relevancy searches. I originally did this for my own benefit, but I decided to post them here was well, in case any Etsy members needed the help as well!

Here's just a few things that I have learned:
  • When titling your item, make sure that the exact phrase of your item is actually in the title. For example, the title "Crochet Cotton Washcloth Set in Pink" is a better title than "Baby Pink, Hand Crochet, Washcloth, Organic Cotton".
  • When titling, the first few words of your title will count towards relevancy more than the words at the end of the title.
  • Use your item tags and categories very carefully!! Try to use all 14 tags for your item, and repeat key words from your title in your tags. Also, many people have had success with making their key word from the title of the item the FIRST tag. So, if my item is "Bath Tea Set with Rosemary, Mint, and Salts", then my first tag should be "Bath Tea".
  • In tags, Etsy is now allowing sellers to use "phrases" in tags. For instance, a seller can now tag an item as "short sleeved tunic" instead of "short sleeved" and "tunic". However, sellers have noticed that they get better search results when all one-word tags are used first, then the remaining tags are filled with phrase tagging. Also, be careful not to stuff tags!! Tagging a rainbow item with "red yellow orange blue green purple" is still against the rules!!
  • One of the first changes that has came to Etsy since their new CEO has arrived is the "Shop Stats" feature. It allows a seller to see where their views are coming from, on which items, and what key words were searched. Use shop stats to your advantage! Use your top key words, and variations of these key words, in your titles!
For more tips, you can check out this admin post, or search through the forums at Etsy!

Happy Hunting!

Monday, September 5, 2011

Crochet Washcloth Pattern

One of the series of items that I will be offering in my Etsy shop will be sets of 3 hand made washcloths. I have been using 100% USA grown cotton, and I've even kept a few for myself! I was my toddler with these nightly!

If you are interested in making these great, economical, and eco friendly, here is the simple pattern that I created:

Simple Cotton Washcloth

Need: Cotton yarn, size I crochet needle
ch: Chain
DC: double crochet
SC: single crochet

1. ch 20, turn
2. DC in each stitch, turn, ch 1
3. SC in each stitch, turn, ch 2
repeat sets 2-3 3 times, for a total of 8 rows
FO

Or, if you are not interested in making your own, these washcloths will be available for sale next week on my Etsy shop! They will be sold in matching groups of three!

Happy creating!!