I love my lip balms! Seriously! I use my lip balms all the time, and I usually have at least 3 floating around in my purse. However, after talking with a few customers, it has come to my attention that most of my customers prefer my lip balms in tubes, rather than my lip balms in tins.
So, I am officially taking my lip balm tins off the market, and making all of those great flavors in lip balm tubes.
The flavors and balms will be the exact same. Just the packaging will change.
I am also going to be debuting some more lip balms made with natural flavors, such as lemon, lime, clove, and licorice!
My plan is to have the current flavors replaced on Etsy and Zibbet by next Friday (June 22), and my new flavors will start to roll out starting on Monday, June 25.
So, if you prefer the lip balm tubes, make sure to grab them up before they are gone!

Friday, June 15, 2012
Monday, June 11, 2012
Summertime Lip Balms
If you are like me, and you are hopelessly addicted to lip balm, then this PSA is for you!
Lip balms are wonderful! They help to soothe capped or sore lips, and they keep our lips soft and supple! Lip balms can come in a variety of fragrances and with different ingredients, but handmade lip balms are quite different from the store bought brand. My lip balms are made with a combination of beeswax, coconut oil, sweet almond oil, or cocoa butter to create wonderful, natural balms. The addition of edible fragrance oils or edible essential oils gives a little flavor to the balm.
My lip balms are pretty solid in their tubes or jars... However, in the heat of the summer, the balms can sometimes become mushy... And no one likes a mushy lip balm!
So, when you order lip balms from me during the hot summer months, before you open the seal on the tubes or tins, just pop your lip balm in the fridge for about an hour, and the balm will harden right back up! You can do the same thing for your store bought lip balms when they get left in hot cars... we've all been there!
Happy summer, everyone! Keep those lips moist!
Tuesday, June 5, 2012
Blackberry and Sage soap preview
Today, I cut one of my finest loafs of soap to date! Actually, it started off as a disaster! My purple colorant morphed into pepto-pink, my green faded to cream, and I spilled a few ounces of soap batter all over the counter! (it's always a good idea to keep some vinegar handy for spills like that!) By the time I slopped the soap into the mold, I was so frustrated that I could have tossed the whole thing!
Instead, on a whim, I decided to oven process my soap. Basically, I put my soap in my warm oven (under 200 degrees) for 2 hours, then let it sit undisturbed overnight, forcing the soap to go through the gel phase.
And my results were worth it! My fragrance is strong and stable, my pink colorant has really popped, and the creamy color seems to have recovered some of the list green! I am over-the-moon excited about this soap!
Look for it in my Etsy shop in 4 weeks... But here is a preview to hold you over:
Thursday, May 31, 2012
Michael's Clearance Score!
Before my trip to Mississippi, I wrangled my toddler and took a quick trip to Michael's craft store to stock up on some yarn. I knew that the car ride was going to be at least 8 hours long, and I figured I would need a way to keep busy, and my crochet needle was the way to go!
So, I kept my kiddo happy with music from my iPhone and picked out 8 gorgeously colored skeins of yarn. And then I did what I always do in craft stores: head to the soap making department!
You can imagine my surprise when I saw all the new soap fragrances and new packaging that Michael's in carrying! New fragrances in larger bottles, new colorants in bright packaging, new molds and cutters and all kinds of things to make me feel giddy!
Then... it hit me... Michael's has a clearance section!
So, I raced with my son and my buggy full of yarn, only to find that the supplies that had been replaced were all marked down considerably! So, after I stopped squealing, jumping, dancing, and receiving strange looks from the other customers, I had scored 6 bottles of rose fragrance oil, 5 bottles of plumeria fragrance oil (my husband's favorite!), 3 bottles of pearberry fragrance oil, 3 tubs of pearl shine, and 4 tubs of glitter!
I've already started making pearberry scented bath bombs and drying rose petals for soap!
And I'm already making plans to visit a few other stores to see if I can get this lucky again!
Life is great!
Happy Creating!
So, I kept my kiddo happy with music from my iPhone and picked out 8 gorgeously colored skeins of yarn. And then I did what I always do in craft stores: head to the soap making department!
 |
| My haul! :oD |
Then... it hit me... Michael's has a clearance section!
So, I raced with my son and my buggy full of yarn, only to find that the supplies that had been replaced were all marked down considerably! So, after I stopped squealing, jumping, dancing, and receiving strange looks from the other customers, I had scored 6 bottles of rose fragrance oil, 5 bottles of plumeria fragrance oil (my husband's favorite!), 3 bottles of pearberry fragrance oil, 3 tubs of pearl shine, and 4 tubs of glitter!
And I scored them all for... $0.79 each!
 |
| $0.79!! |
I've already started making pearberry scented bath bombs and drying rose petals for soap!
And I'm already making plans to visit a few other stores to see if I can get this lucky again!
Life is great!
Happy Creating!
Wednesday, May 30, 2012

Monday, May 28, 2012
Tutorial: Homemade Deodorant
Homemade deodorant? Man, Milly must have really gone off the deep end...
Nope! I promise! You are going to LOVE this homemade deodorant! There are no aluminum or any other nasty additives. And it actually works really good! It took me about 10 minutes total to make my deodorant, and I even had some left over... Plus, it is super cheap!
You will need:
1/4 cup baking soda
1/4 cup corn starch
3 tsp coconut oil (you can use shea butter if you prefer. I havent tried it, though)
1-3 drops of essential oil or body safe fragrance oil
Mixing bowl
Container (I used an empty deodorant container and it's working great)
1. Combine the dry ingredients together.
2. Add your coconut oil and fragrance. I combined them together using my hands, but a spatula would work well, too. The coconut oil may melt a little if you use your hands.
3. When it is fully combined, spoon the mix into your container. Put the container in the fridge for an hour or so to harden your mix.
When using your new deodorant, make sure to apply it lightly. A little goes a long way!
Nope! I promise! You are going to LOVE this homemade deodorant! There are no aluminum or any other nasty additives. And it actually works really good! It took me about 10 minutes total to make my deodorant, and I even had some left over... Plus, it is super cheap!
 |
| Your Supplies |
You will need:
1/4 cup baking soda
1/4 cup corn starch
3 tsp coconut oil (you can use shea butter if you prefer. I havent tried it, though)
1-3 drops of essential oil or body safe fragrance oil
Mixing bowl
Container (I used an empty deodorant container and it's working great)
1. Combine the dry ingredients together.
3. When it is fully combined, spoon the mix into your container. Put the container in the fridge for an hour or so to harden your mix.
When using your new deodorant, make sure to apply it lightly. A little goes a long way!
 |
| Deodorant! :o) |
Thursday, May 24, 2012
Crinkle Cut
I recently purchased a brand new soap cutter... I've been using knives and dough scrapers for so long, that I had almost forgotten that there are really cool crinkle cutters out there! For months, I have been drooling over crinkle cutters online and searching through thrift stores and kitchen supply stores for a crinkle cutter, only to find one in my local Michael's when I was not even looking! Score!
I have finally gotten a chance to break the cutter in on a new batch of Sandalwood soap. For my sandalwood soap, I used freshly rendered tallow (big thanks to my meat cutter bro-in-law for the suet cuttings!), olive oil, and coconut oil, with some gold colored dye and sandalwood fragrance oil.
I added an interesting touch in a moment of worry. Usually, when I use a large amount of hard oils (tallow, coconut), I get loads of soap ash. In order to combat the ash, I wrap up my loaf in saran wrap... but I found out that I was out! So, instead, I covered the top with bubble wrap, and it made a great looking honeycomb effect! Awesome!
So, after letting the soap sit for about a day and a half, then a few hours in the freezer, the log was ready to cut... And I think that the combination of the bubble wrap/honeycomb with the crinkle cut has given the soap a whole new look!
I am in LOVE with the effect!!
Look for the soap in my Etsy shop and Zibbet shop around mid-June!
 |
| Before the cut! |
I added an interesting touch in a moment of worry. Usually, when I use a large amount of hard oils (tallow, coconut), I get loads of soap ash. In order to combat the ash, I wrap up my loaf in saran wrap... but I found out that I was out! So, instead, I covered the top with bubble wrap, and it made a great looking honeycomb effect! Awesome!
 |
| After the cut! |
I am in LOVE with the effect!!
Look for the soap in my Etsy shop and Zibbet shop around mid-June!
Monday, May 21, 2012
Vacation Time!
I just wanted to let you all know that I will be out of town this week. My parents, my sister, my son and I will be visiting my grandparents in Columbus, MS. We are really excited to go and see our family!
We are leaving Monday evening, and we will be back late Thursday night.
I will have my laptop and iPhone with me, so I will still be in contact with everyone. However, any orders that come in after Monday at 5pm EST until Friday will be shipped on Friday. I am sorry for any inconvenience that this may cause.
I hope you all have fantastic days! <3
Tuesday, May 15, 2012
Celebrations!
Wow, my soap shop venture is really taking off!
On facebook, my fan page has recently topped over 200 fans!
At my Etsy shop, I'm up to 59 sales, each month being better than the one before!
I'm starting to branch out, opening shops at Zibbet and preparing to open one at TheCraftStar. I've also started accepting Direct Checkout through my Etsy shop, so now you can buy without using PayPal.
Things are going fantastic! Loving all of the love!
Thursday, May 10, 2012
Plants for Soaping
For some of my soaps, I like to add in extras, like dried herbs and flowers. For my sister-in-laws wedding favors, I added bits of rosemary to the rosemary-scented soap, and I have been known to color soap with parsley, tumeric, paprika, and kudzu.
Currently, I am growing some marigolds to cut and dry for calendula petals, along with loofahs, and I've been looking around to see what other plants I can dry...
My in laws have lots of plants and flowers around the farm, but this past weekend I had my eye on a deep red rosebush and a bright pink rosebush! My husband and I collected handfuls of rose petals, and we have laid them out to dry in prep for a layered rose soap.
We've also started looking at our groceries to see what we can use and reuse. We recently replanted the heart of our last batch of celery, and it is growing back more celery! Yum! We also just bought a big bag of navel oranges, and we're saving and drying the peels to use in soaps and bath teas. Dried orange peel can be found in the spice section of the grocery store, but it is WAY cheaper to dry out your own peels! I've dried orange peels before, and they got very hard as they dried, so I am going to run them through my food processor after they are dry to get them to a finer consistency.
Happy Creating!
 |
| Pink and Red Rose Petals |
My in laws have lots of plants and flowers around the farm, but this past weekend I had my eye on a deep red rosebush and a bright pink rosebush! My husband and I collected handfuls of rose petals, and we have laid them out to dry in prep for a layered rose soap.
 |
| Orange peels |
Happy Creating!
Monday, May 7, 2012
New Fragrances and... Bath Fizzies!
It's that time again... The exciting moment when I place an order for new supplies! My favorite time of year! As always, I placed my order with AromaHaven.com and it arrived lightning fast! I ordered Sunday night and my package was on my doorstep by Tuesday. They have fantastic customer service!
I am so excited about my four new fragrances, and I have big plans for them! The first one on my list of "must-haves" was Blackberry sage. I have heard loads about this rich, herbal fragrance, and was dying to stick my nose in it! :o) The blackberry is a sweet, light high note, followed by the rich, warm, herbal scent of sage. It is going to make a lovely soap, but I am really dying to try it in wax tarts (which I am hoping to expand into this summer!)
One fragrance that I definetly wanted to invest in is a rich Christmas scent. Last year during the holiday season, I snagged a great 3-D Christmas tree mold, and I am already anxious to give it a try. So, my second fragrance of choice is one called "Country Christmas." I've actually smelled this in candles before, but never placed it. The scent is a great mixture of all of the wonderful things about Christmas: mulberry, cranberry, pine, and rich spices.
Third, and the one that I am most anxious to soap with, is a simple fragrance called "Granny's Green Apple." It is the perfect representation of a granny smith apple, to the point where my mouth waters when I sniff! A few months back, I had an interesting idea for a Halloween soap based off of the poison apple from "Snow White", and I cannot wait for you all to see it! (Hint: no poison, just loads of apple goodness!)
My fourth and final fragrance was a tough one, but I made the perfect choice... My in-laws own a dairy farm in East Tennessee, and every summer and fall they attend county fairs and participate n dairy cattle shows. My mother-in-law has been encouraging me for the past three years to set up a booth to sell my wares, and this year, I am going to do it. So, I will be making dairy cattle inspired soaps! I just needed to find the right scent... and I found it in "Clover Fields and Aloe." It is light, arid, and reminds me of the sweet smells coming from the fields after a cool rain.
Along with my new fragrances, I picked up two pounds of premade bath bomb base. For months, I have been researching how to make bath bombs and bath fizzies, and I've been weighing my options between premade bases or bases made from scratch. Once our move is complete next week, I'll be making my first bath bombs, so look for a blog post soon!!
I am so excited about my new supplies, and my hat goes off to AromaHaven and their fantastic products and services! Thanks so much!
Happy Crafting!
I am so excited about my four new fragrances, and I have big plans for them! The first one on my list of "must-haves" was Blackberry sage. I have heard loads about this rich, herbal fragrance, and was dying to stick my nose in it! :o) The blackberry is a sweet, light high note, followed by the rich, warm, herbal scent of sage. It is going to make a lovely soap, but I am really dying to try it in wax tarts (which I am hoping to expand into this summer!)
 |
| My four new scents! |
Third, and the one that I am most anxious to soap with, is a simple fragrance called "Granny's Green Apple." It is the perfect representation of a granny smith apple, to the point where my mouth waters when I sniff! A few months back, I had an interesting idea for a Halloween soap based off of the poison apple from "Snow White", and I cannot wait for you all to see it! (Hint: no poison, just loads of apple goodness!)
My fourth and final fragrance was a tough one, but I made the perfect choice... My in-laws own a dairy farm in East Tennessee, and every summer and fall they attend county fairs and participate n dairy cattle shows. My mother-in-law has been encouraging me for the past three years to set up a booth to sell my wares, and this year, I am going to do it. So, I will be making dairy cattle inspired soaps! I just needed to find the right scent... and I found it in "Clover Fields and Aloe." It is light, arid, and reminds me of the sweet smells coming from the fields after a cool rain.
 |
| Bath fizzy base... I cannot wait to dig in! |
I am so excited about my new supplies, and my hat goes off to AromaHaven and their fantastic products and services! Thanks so much!
Happy Crafting!
Thursday, May 3, 2012
Make it MiO - A review
I have always had a tough time drinking straight water... I've tried all kinds of water flavorings, but when I tried MiO for the first time, knew I was hooked!! First, I fell in love with the Peach/Mango and the Sweet Tea, but then, I became addicted to the Green Thunder MiO energy(which is supposed to be an apple/citrus combination, but to me it tastes like those old candy sticks that you would lick and dip in the powdered candy... NOM!).
I am a fan of the MiO Facebook page, and a few weeks ago, they announced a free giveaway of their two newest flavors: lemonade and blueberry lemonade! Freaking blueberry lemonade?!? Sign me up!! I stalked their page for three days before I got my free sample confirmation...
And now, its here!
I was so surprised with my sample... I figured I would receive a sample similar to what you get shampoo samples in (you know, the flat, plasticy samples that you squeeze out?), but I got a whole freaking bottle!! I almost danced right there at the post office!
How does it taste?
Freaking amazing! When you first taste it, the blueberry is the high note (first thing you taste), and it is light and sweet. The tart of the lemon comes next, but it is not overwhelming. The two compliment each other without overpowering. And if you are like me and like a light touch of MiO to your water, this flavor is perfect with just a small squeeze.
And did I mention that the color of my water is a gorgeous violet color?
I have tried all of the MiO flavors except for the new Lemonade and the Orange/Tangerine, and the Blueberry Lemonade blows them ALL out of the water! I have a new favorite!
Make sure to go and like the MiO facebook page for a chance to try out their latest flavors!
I am a fan of the MiO Facebook page, and a few weeks ago, they announced a free giveaway of their two newest flavors: lemonade and blueberry lemonade! Freaking blueberry lemonade?!? Sign me up!! I stalked their page for three days before I got my free sample confirmation...
And now, its here!
I was so surprised with my sample... I figured I would receive a sample similar to what you get shampoo samples in (you know, the flat, plasticy samples that you squeeze out?), but I got a whole freaking bottle!! I almost danced right there at the post office!
 |
| My sample of Blueberry Lemonade! |
How does it taste?
 |
| Pretty cup of yummy! |
And did I mention that the color of my water is a gorgeous violet color?
I have tried all of the MiO flavors except for the new Lemonade and the Orange/Tangerine, and the Blueberry Lemonade blows them ALL out of the water! I have a new favorite!
Make sure to go and like the MiO facebook page for a chance to try out their latest flavors!
Wednesday, May 2, 2012

Tuesday, May 1, 2012
Handmade by me!
If you are familiar with the inner working of Etsy, then I am sure that you are familiar with the recent controversy that has been swirling around in the forums. (If not, check out this Regretsy post and this update.) I have been torn on the controversy, keeping mostly to myself in the forums and watching others talk it out.
However, I have been suckered in by a passive protest. Now, a group of sellers has began changing their avatars to pictures of their hands, to show that their work is all handmade. I just could not resist!
I want all of my readers to be reassured that the work at Second Spring Soaps is all handmade by me. I design and make all of my bath products in my little home. You can check out these facebook photos of me making soap if you want, or watch some of my YouTube videos.
For what it is worth, my heart is broken over all of the Etsy shenanigans. I would have felt much better if Etsy would have apologized for its mistake, and I believe that most of this would have blown over before now. I honestly believe in handmade, and I try my best to support others who are trying to make this world a little more unique. I just... I dont even know. I hope that the handmade community can survive.
However, I have been suckered in by a passive protest. Now, a group of sellers has began changing their avatars to pictures of their hands, to show that their work is all handmade. I just could not resist!
 |
| The hands that make! |
For what it is worth, my heart is broken over all of the Etsy shenanigans. I would have felt much better if Etsy would have apologized for its mistake, and I believe that most of this would have blown over before now. I honestly believe in handmade, and I try my best to support others who are trying to make this world a little more unique. I just... I dont even know. I hope that the handmade community can survive.
Saturday, April 28, 2012
Tri-Cities Flea Market
Our local farmer's market will open next weekend, but my husband and I are already craving fresh veggies... So today we piled into the car and headed down to our flea market!
Just as I had hoped, we found quite a few veggie vendors, and scored some new red potatoes, a basket of cucumbers, and juicy, full tomatoes!
Benjamin was quite pleased!
Just as I had hoped, we found quite a few veggie vendors, and scored some new red potatoes, a basket of cucumbers, and juicy, full tomatoes!
Benjamin was quite pleased!
Friday, April 27, 2012
Farewell, Spring Semester... Hello, Moving Day!
With only finals week left to go, I am looking forward to my summer vacation! I cannot wait to spend my summer with my son, playing outside, picking blackberries, and selling soap at our local farmer's market! I am also looking forward to the Fall semester, when I will start taking business classes in earnest, and I will take my first accounting class... Kind of scary, but I am excited!
The only thing I am NOT looking forward to is our summer move.
My family and I are fortunate enough to live in family housing at East Tennessee State University, where I attend. However, our apartment complex is fairly old and in need of some renovations. So, for the summer months, we are being relocated to another apartment on campus. While I am excited about the new apartment (and the washer/dryer that comes with it!), the process of packing up our things has me panicky. Not to mention, I am also having to pick up my business and move it, just to move it again come August when the renovations are complete! Argh! Stressful!
In preparation for the move, I have limited myself by not making any new soap for the past few weeks, so I do not have to worry about moving any soft soap. My tasks for this weekend include wrapping the last few bars of soap that have finished curing and packing them away. I've found that packing my soaps, lip balms, and other things in rubbermaid shelves has made the easy to transport and lift, as well as keeping them at hand in case any new sales come in during the move.
Plus, once we are moved and (kind of) unpacked, I can start making more soaps!! So, be on the lookout in my Etsy shop and my Zibbet shop for new creations!
I guess I have put off packing for long enough... Happy Creating!
The only thing I am NOT looking forward to is our summer move.
 |
| Packed and ready to go! |
In preparation for the move, I have limited myself by not making any new soap for the past few weeks, so I do not have to worry about moving any soft soap. My tasks for this weekend include wrapping the last few bars of soap that have finished curing and packing them away. I've found that packing my soaps, lip balms, and other things in rubbermaid shelves has made the easy to transport and lift, as well as keeping them at hand in case any new sales come in during the move.
Plus, once we are moved and (kind of) unpacked, I can start making more soaps!! So, be on the lookout in my Etsy shop and my Zibbet shop for new creations!
I guess I have put off packing for long enough... Happy Creating!
Wednesday, April 25, 2012
Monday, April 23, 2012
Blackberry Winter
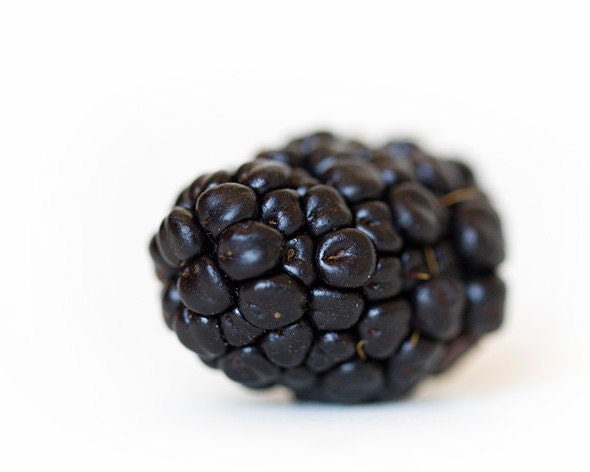 |
| Photograph by Cassie at LifesSimpleMoments.etsy.com |
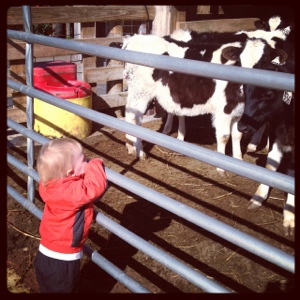
In fact, last week as I was walking with my Mom and son, I noticed that a wild blackberry bush had not yet bloomed, and I mentioned to my mother, "We're in for a cold snap." She glanced down at the purple blackberry vines and agreed. Little did we know tyhat the cold snap was less than a week away!
So here we are, huddled against the cold and wind in the last week of April, and all I can think about is the middle of July, when the blackberries are warm and juicy straight off the plant, the berries bursting in mouths, and staining lips and fingers...
Summer cannot come fast enough! Enjoy your Blackberry winter!
Monday, April 16, 2012
Reused Crayons
.JPG)
So, this weekend, we took all of those old crayons, and remelted them into new ones!
You will need:
crayons
.JPG) |
| Crayon bits in the mold |
oven
First, you will need to break up your crayons into medium-to-small sized chunks. You can mix colors together like I did (I mixed my yellows/oranges, red/purple/pink, and blue/gray), or you can keep your colors separate. Make sure that you remove all of the paper and adhesive from the crayons!
Next, just toss the crayon pieces into your mold. Put your mold into the oven and set it to the lowest possible setting. I melted my crayons at 150 degrees for 10 minutes, and they came out perfect!
.JPG) |
| Finished new crayons! |
Once the crayons are completely melted, just remove the mold and let the crayons cool to room temperature before removing them. Your colors will blend together and make great patterns! My son adores his new football-shaped crayons... great for his little hands!
One thing that I notices after coloring with the new crayons, there was a thin layer of uncolored wax that formed on the top of the crayon while it was still in the mold . I just used a butter knife to scrape it away.
Happy coloring! :o)
Wednesday, April 11, 2012

Subscribe to:
Comments (Atom)