Friday, July 19, 2013

Friday Spotlight: Blackberry Sage

This week's spotlight soap coincides with the ripening of the local blackberries here in East TN! My blackberry sage soap captures the scent of the berry perfectly and pairs it with the herbal sage for an amazing scent!

The soap is swirled on top with purple, green, black, and white for a dramatic look. The swirl is the peacock swirl, making each bar slightly different. The base is swirled with purple and green.

The scent is amazing! Blackberry sage is warm and inviting, with juicy notes of berry anchored with warm notes of sage.

Want to check out my blackberry sage soap? Click here!

Monday, July 15, 2013

More Awesome Supplies!

I broke a promise to myself... I actually promised myself that I would not buy any more fragrance oil this summer. I've got scents of every shade running out of my ears... But then, two magical things happened, and I ordered new goodies! Wanna see?

Well, the first magical happening coincided with a trip to town and a browse down the $1 aisle... and I stumbled upon some new silicone ice cube trays. I'll admit: I think I squealed like a fan girl when I realized what they were...
Oh my!

That's right! Bacon, lightning bolts, sausages, bottles, and pickles!
I HAD to get them... but what in the world was I going to scent these new, crazy soaps?
After doing a little research, I placed an order with Nature's Garden for some new fragrance oils: Bacon, Dill Pickle, Root Beer, and Mountain Dew! My husband thought that I had lost my mind, but I am so excited to offer these funky new soaps with funky new scents!

My only problem, is that I have NO IDEA what to scent those sausage soaps!! Ha!

The second magical happening involved Aztec Candle and Soap Supply Company out of Knoxville. Knoxville is about 2 hours west of me, and I have been dying to give their products a shot. Having a supplier so close is something that I have dreamed of. Well, last week, Aztec announced that they were holding a sale for the 4th of July holiday... All of their fragrance oils were $1 for 1 ounce! WOW!!

So, here's my haul:

Whoa, right? I've already used two of my new FOs (Gardenia and Cantaloupe/Lily), and I hope to use another one today! So far, the fragrances have performed perfectly! No acceleration or discoloration... They were a soaper's dream! Some of the other new fragrances that I picked up are Toasted Marshmallow, Bourbon, Tobacco, a Chamomile/Lavender blend, and Cactus and sea salt!

What a haul!

Friday, July 12, 2013

Friday Spotlight: Cup O' Coffee Soap

This week, let's take a look at the soap that will definetly wake you up in the shower: my Cup O' Coffee Soap!

Cup O' Coffee Soap
This soap is vegan friendly with an olive oil base, so it is mild and moisturizing. The soap is colored a dark brown, just like that cup of java that you sipped on this morning. The soap is topped off with a creamy swirl and sprinkled with real coffee beans for a mild exfoliate.

The scent is called "coffee house", and it is a real, true coffee scent. Just plain, black coffee! Delish!

I was lucky enough that this soap was featured in a recent treasury alongside other awesome coffee products! Wow! Thanks!

Make sure to give my soap, and this amazing treasury, a look over at Etsy.com!

Wednesday, July 10, 2013

Swirling Soap Series: Simple Swirl

This swirl is another simple swirl, but the end effect is gorgeous! We have talked about the nonpareil swirl, and this swirl is similar, with one slight difference: instead of using a comb to create our effect, we are going to use one chopstick.
Tea tree/Peppermint Soap

Before you begin...
Basics:
You will want to start off with a slow moving recipe (recipes with 70% olive oil or above work well for me) and a fragrance that does not accelerate trace. Mix your lye and oils together until you reach emulsification, which is where the oils and lye are mixed together, but not thickening. You will want your mix slightly runny. Once you reach emulsification, add your fragrance, then set aside a few ounces of soap into separate containers to color. When choosing the colors for your soap, remember that bright, contrasting colors work great! The addition of black, white, and brown can make a very dramatic effect. 

Tools:
For this swirl, all you will need is a chopstick and a paper towel to clean the chopstick off. You can retire your comb for now!

Diagonal Lines
Normal Soap Lines


So, we are going to start off with drawing our colored lines in the soap. Make sure to alternate your colors! You can go left to right, or you can draw diagonals, like I did in my example above. 


Once your lines are drawn, start at the top of your mold and insert your chopstick. Drag it down the mold until you reach the bottom. Clean off your chopstick, then insert it in the bottom of the mold about a half inch from your first line, then drag your stick to the top. Clean off your chopstick and start over, alternating lines from top -> bottom, then bottom -> top, until you have reached the other side of the mold.

You are finished! This swirl gives your soap a gorgeous feathery look, and can be done with as little as two colors. This is one of my favorite swirls, and it is my go-to swirl for many soaps.

Monday, July 8, 2013

I've been featured in PVB!

I am so excited to announce that my green apple bath bombs have been featured in the 
Promoting Valued Businesses Blog! Wow! 
My green apple bath bombs!

Make sure to go and check it out and look at all of the great businesses featured!

Friday, July 5, 2013

Friday Spotlight: Soap of the Month July 2013 - Simply Lavender Soap

July's soap of the month is one of my most popular soaps at craft shows: Lovely Lavender soap!

My Lavender soap is a vegan soap, made with olive oil, coconut oil, and castor oil. I make these bars using the hot process method, and decorate the bars with chunky swirls of cream and purple. The hot process method requires the soap to cook in a crock pot for a few hours, making the soap usable immediately, instead of curing for up to 6 weeks. 


Almost everyone loves the classic scent of Lavender! Lavender has been hailed for its aromatherapy properties, including helping people relax and may even help with sleep.


Throughout the month of July, catch my Lovely Lavender soap at a discounted price of $5!

Wednesday, July 3, 2013

Swirling Soap Series: French Curl Swirl

So, the second swirl in my series begins with the nonpareil swirl that we did two weeks ago. Head over to that post to catch up if you need to. This swirl starts off as a nonpareil swirl, then adds a little twist!

A few things to remember...
Basics:
You will want to start off with a slow moving recipe (recipes with 70% olive oil or above work well for me) and a fragrance that does not accelerate trace. Mix your lye and oils together until you reach emulsification, which is where the oils and lye are mixed together, but not thickening. You will want your mix slightly runny. Once you reach emulsification, add your fragrance, then set aside a few ounces of soap into separate containers to color. When choosing the colors for your soap, remember that bright, contrasting colors work great! The addition of black, white, and brown can make a very dramatic effect. 

Tools:
You will need a combing tool, which can easily be made at home. I made my combing tool using cardboard and chopsticks. I attached my chopsticks to my combing tool using a hot glue gun. It works great!  

Now, let's get started!

1. First, start by drizzling your colors left to right in your mold until you run out of color. Toward the end, make sure that all the colors you chose are showing on top.
2. Now, use your combing tool and drag downward on one fluid motion to create the nonpareil swirl. For the first tutorial, this is where we stopped. Today, we are going to take it one step further.
3. Using a chopstick (or similar tool), start at the upper left hand corner of your mold and draw a small to medium sized curl. Keep drawing curls in your soap until it looks similar to this:

Curls!
You're done with the french curl swirl! I made my french curl soap with Pomegranate Vanilla fragrance oil in shades of pink, magenta, and white and topped it off with a little glitter.
The french curl swirl

Monday, July 1, 2013

I'm featured!! Candle et Polish

Happy Monday morning, everyone!

I just wanted to share some excellent news that I stumbled upon this weekend while checking out my Etsy stats. I kept noticing that I was getting hits from a blog... And they kept coming... And they kept coming...

So, I finally decided to head over to this mysterious blog to see what was going on over there!

Candle et Polish feature!
I stumbled upon a French blog called Candle et Polish, a great little blog by Agnes, a customer of mine from a few weeks ago. Anges purchased some of my wax tarts, and she was featuring them alongside other candles and tarts! Wow! Thank you, Agnes!

I love my international customers... Did you know that I ship internationally?!?

Friday, June 28, 2013

Friday Spotlight: Clove Lip Balm

This week, let's take a look at my clove lip balm!

All of my lip balms are made with three basic ingredients: beeswax, deodorized cocoa butter, and coconut oil. These three combine together to make a firm balm with a smooth glide.

This lip balm is scented with clove essential oil, which not only smells like the sweet autumn herb, but tastes like it, too! Clove is a classic in the fall, but I love this lip balm year-round.

Out of all of the lip balms that I offer in my zibbet shop, this has been my most popular by far! Check out some of these rave reviews: 


  • "The order arrived quickly and is really close to the Clove Lip Balm that Burts Bees discontinued. Couldn't be happier!"

  • "Really great lip balm! This is the only balm that helps my lips, as I have an auto-immune disease that limits the amount of saliva I produce. Really fast shipping! Thank you!"

  • "This is the best clove lip balm I've had since Burt's Bees discontinued theirs! I highly recommend it!"

Wanna check out my clove lip balm? Click here and go to my Zibbet shop!


Monday, June 24, 2013

Soap Tutorial: How to make Rebatched Milk Soap

About a week ago, I was reading on a parenting community that a member wanted to make some milk soap, but she was not comfortable with handling lye. On the surface, this would limit soap making to melt and pour varieties. However, there is another option: rebatched soap, or french milled soap!

To make french milled soap, you will need:

  • a double boiler (I use a candle pouring pot that sits in a pot of water on my stove)
  • 1 pound (4-5 bars) of cold process or hot process soap
  • Up to one ounce of milk (any kind of milk will work. I have great success with goat's milk and butter milk)
  • Any scents, fragrances, or essential oils that you want to use
  • A mold
  • A spatula
  • A knife or cheese grater
1. Start off with cutting your soap up into small chunks or grating your soap with a cheese grater. 
2. Put your soap chunks into your double boiler and warm the water on medium heat.
3. As your chunks are warming, slowly stir in your milk one tablespoonful at a time. You may not need the full ounce of milk. Look for a chunky-mashed potatoes-type of consistency in your soap. If the soap is not 100% smooth, it is okay. 
4. Now is the time to add any color, fragrance, or essential oil that you like. I made my rebatched milk soap with ginger essential oil and orange essential oil.
5. Using your spatula, carefully pour your soap into your mold. Let it cool overnight before unmolding and cutting. Put your soap in a cool, dry place to "cure", or harden. The harder your soap, the longer it will last!

Friday, June 21, 2013

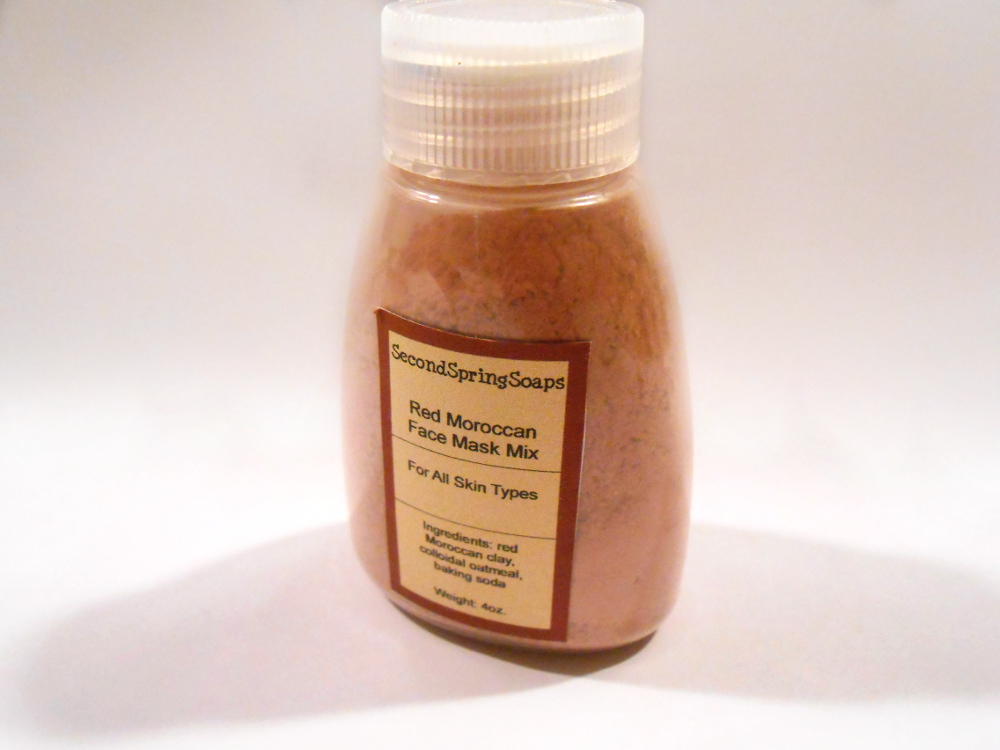
Friday Spotlight: Red Moroccan Clay Mask

My model : My sister
This week's product spotlight is on my Red Moroccan Clay Mask!

My clay masks were a huge hit on the craft show circuit in East Tennessee, so I brought them over to my Etsy shop! My masks are made with a few different ingredients that all work together to soften and smooth your skin.

The first ingredient is the red clay, which has been used as a cosmetic clay for centuries. Red clay helps to pull impurities out of the skin while wet. Red clay is full of great minerals, including silica, magnesium, potassium, and calcium

The second ingredient is ground oatmeal. Oatmeal has always been known to soothe skin, and is a traditional remedy for itchiness associated with chicken pox.

The third, and last, ingredient in my face mask is baking soda. Baking soda is a mild exfoliate, working to smooth the skin as you apply the mask. Baking soda also works to fight blackheads.


Wednesday, June 19, 2013

Swirling Soap Series: Nonpareil Swirl

After finishing my first attempt at a peacock swirl, I became obsessed with different swirling techniques. I worked on my swirling while watching videos on youtube and talking to my friend Michelle, who makes amazing marbled and swirled paper (shout out for Michelle and her shop DynamiteFibers!) After realizing how few tutorials there were online, I decided to start documenting my swirling on my blog. So here we go with our first swirl in the series: the nonpareil swirl.
Basics:
You will want to start off with a slow moving recipe (recipes with 70% olive oil or above work well for me) and a fragrance that does not accelerate trace. Mix your lye and oils together until you reach emulsification, which is where the oils and lye are mixed together, but not thickening. You will want your mix slightly runny. Once you reach emulsification, add your fragrance, then set aside a few ounces of soap into separate containers to color. When choosing the colors for your soap, remember that bright, contrasting colors work great! The addition of black, white, and brown can make a very dramatic effect. 

Tools:
You will need a combing tool, which can easily be made at home. I made my combing tool using cardboard and chopsticks. I attached my chopsticks to my combing tool using a hot glue gun. It works great!  

Start off by pouring the base of your soap, which should be the majority of your batter. 

Next, color your soap batter that you set aside and drizzle that soap on the surface of your base. You will want to drizzle side to side, rather than up and down.
Soapy lines from left to right
Once you have drizzled your lines back and forth, now is the time to use your combing tool. Insert your combing tool at the top of your mold, then pull down in one, solid stroke. Your comb will create the nonpareil swirl as it pulls down.

That's it! You are done! Super simple, yet really gorgeous! 
Come back next Wednesday when I break down the peacock swirl!

Monday, June 17, 2013

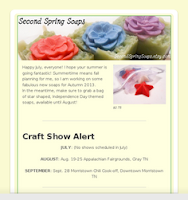
Sign up for my Newsletter!

One of my great new projects this summer has been the official start of my email newsletter! I have been noodling around with a newsletter for a few months, but never had the time to really sit down and do it... The summer months have finally given me that opportunity!

Preview of Issue #1!
So, I am proud to announce that my newsletter will go live on July 1st! I am so excited for the first issue to go out. I am featuring my soap of the month, which is a soap that is discounted throughout the month, as well as the featured sample of the month. My newsletter will also feature my upcoming craft shows for the next three months, as well as a bath and body project that you can do at home! Plus coupons, sneak peeks, and more!

Interested in signing up? Well, just follow this link and enter your email to receive it! Simple as that!

Hope to see everyone sign up, and be on the lookout for newsletter #1 in July!

Friday, June 14, 2013

Friday Spotlight: July 4th Red, White, and Blue Star Soaps

Today, let's take a look at a seasonal product: my Red, White, and Blue Star Soaps!

These soaps were designed just in time for the Independence day celebrations on July the 4th. The soaps are made from a vegan melt and pour base and molded in the shapes of stars.

One white bags of soaps contains two red, two blue, and two white soaps. Each soap is scented with a blend of wildberry and lemon. The blend reminds me of lemonade and blackberries at my grandmother's house in the summertime.

These soaps will be available through the patriotic season, and will come back around every summer. Stock up while you can!! These soaps are great to use as guest soaps, hand soaps, decorative soaps, or travel soaps! Find them in my Etsy shop!

Monday, June 10, 2013

Fantastic Supplies for Fall/Winter!

It may be June, but my eyes and nose are already deep into Fall and Winter! This month, I will begin making my fall soaps and other items, so I've started getting in new fragrances for fall and winter, as well as working on summer makeovers for my wax tarts and bath bombs.

Lets get to the good stuff first! Fragrances!
I made an order with a new company this week: TheCandleSource.com! I found them through eBay, but I ended up buying directly through them. I picked up three fragrances: Kumquat, Sleigh Ride, and Monkey Farts. I've had many requests for Monkey Farts, so I was anxious to get this one in. I am so delighted with my goodies, the shipping was fast, the prices were excellent, and I cannot recommend TheCandleSource enough!

I also made an order with AromaHaven. I love selling wax tarts, but this summer I decided to give my tarts a makeover from the single tart to clamshell breakaway tarts. My wax also got a makeover: All of my tarts are now being made with soy wax! I picked up some great clamshell molds/packaging from AromaHaven, and I am so pleased with the results.
While at AromaHaven, I picked up four new fragrances:
-- Wild Muscadine: A sweet grape scent with hints of musk... Totally Southern!
-- Applejack N' Peel: An apple, cinnamon, and cider blend. Another heavily requested scent!
-- Corn Husk: A combo of citrus, sweet fruit, floral, and amber musk
-- Red Maple Leaf: A lighter scent with maple leaf, patchouli, sandalwood, and fern.

I also ordered some new molds off of eBay for my upcoming craft shows.

First, I ordered a new Snowflake silicone mold, which arrived today. I am already thinking of Peppermint soaps, Eucalyptus soaps, Sleigh Ride Soaps, and lots and lots of glitter!

Second, I ordered a cute Apple silicone mold. I picked up the Apple mold because I recently applied to attend the Apple Festival in Erwin, TN, and if I am picked to attend (cross your fingers!), I'll have apple-shaped soaps with me! (Sneak peek: My apple soaps will be scented with applejack n' peel, apples and mint jelly, and granny's green apple!)

This fall is going to smell amazing! I cannot wait to get started!

Friday, June 7, 2013

Friday Spotlight: June 2013 Soap of the Month - Waterlily Orange

Soap of the Month: June 2013
This month's Soap of the Month is Waterlily Orange, a very popular soap at craft shows!

This soap is a vegan cold process soap in blue and orange, with a very unique, lovely scent. The soap was made with olive oil, coconut oil, and castor oil for a mild, hard bar of soap. It was colored in layers of blue and orange, with delicate orange flowers gracing the tops of the soap.

The scent is called Waterlily Orange, which is a lovely mix of the floral and citrus. Lily notes top off the scent, with orange notes in the middle, and an anchor note of amber.

Since this is my Soap of the Month, you can catch these bars at a discounted price of $5! Also, be on the lookout for samples of Waterlily Orange in all orders going out in the month of June (while supplies last). Make sure to head over to my Etsy shop and grab a bar before they are all gone!!

Monday, June 3, 2013

First Attempt at a Peacock Swirl

I've seen the peacock swirl around in the soaping world, and while it is gorgeous and produces amazing looking bars of soap, I've always been a bit hesitant to start such a complicated-looking technique. I love beautiful, bold swirls on the tops of soap (so much that I bought a mold just so I could do them!), so yesterday, I decided to bite the bullet and try a peacock swirl.

First, I watched this video by LovinSoap about 10 times in a row.

Then, I attempted the swirl using my 9 bar mold from Brambleberry.com and Blackberry Sage Fragrance Oil  from AromaHaven.com. I chose this mold because it gives me lots of room to swirl on the top of my soap, and I chose this scent because it does not accelerate, giving me plenty of time to work.

And here are my results:

I like the swirl and it is very pretty, but it is not in the classic peacock, or bouquet.

I think I have identified two problems with my first attempt:

1. My lines of soap in the beginning were more thick than I have seen others do. I think I need to thin out my lines, which will give me more room to have more lines and more swirl.

2. I drew my S-curve very wide. Next time, I am going to tighten up that curve, hopefully giving myself more swirl per inch.

All in all, I am pretty happy with the soap, I love the colors and the scent, and the swirl isnt terrible for a first timer. The soap gelled overnight, so the green and purple really pop next to the white and black. I have some new fall and winter scents coming in next week, so I'm looking forward to practicing this advanced swirl a few more times! Plus, I am going to get some help from a friend of mine who is an expert at swirling and marbling paper! Go check out her Etsy shop here: DynamiteFibers


Friday, May 31, 2013

Friday Spotlight: Tea Tree and Peppermint Soap

I really miss my weekly segments focusing on different sellers on Etsy, so this summer, I am debuting a new weekly segment: Friday product spotlight!
____

Let's take a look at this week's spotlight: Tea Tree and Peppermint Soap!

This soap is a vegan soap made with olive oil for mildness, coconut oil for hardness and cleansing, and castor oil for loads of bubbles. The soap was made using the hot process method, where the oils, lye, and water are cooked until the mixture is completely saponified.

I colored this soap with activated charcoal powder, which is a natural black. Activated charcoal is known for drawing out toxins.

The soap was scented with a combination of tea tree essential oil and peppermint fragrance oil. Tea tree is a medicinal scent that is a light medium note. Tea tree has antibacterial properties. The combination of tea tree and peppermint is classic and rounds out both scents perfectly.

The combination of activated charcoal and tea tree makes this soap a great facial soap for people who suffer from acne breakouts.


Tuesday, May 28, 2013

Spring Fling Festival, May 2013

Last weekend was the Spring Fling Festival in Chucky, TN at Mountain View Bulk Foods. This is the second time I have been to this gathering; I went last year in October on a cold, windy day. Saturday was gorgeous, and it was great to see everyone coming out in support of small business!

My booth has had a complete makeover since my last time at this show. I'm slowly working my way to a green theme with accents of yellow and purple. I am extremely happy with the booth! I've even started adding some decorations to help draw in folks!
My booth! Loving the green...

I brought along most of my products, including my newest soaps scented with coffee, honeysuckle, and grass! My grass soaps were my most popular, and I almost sold out of them! I am making more this weekend, and I hope to have them up on my Etsy shop soon.

Green grass soap
I also brought along my lip balm, bath bombs, bath salts, and body sprays. I debuted my bath bomb cupcakes, which will be photographed and listed soon.

Next weekend I will be at Grogan Park in Gate City, VA! Come out and see me, Southwest Virginia!

Thursday, May 23, 2013

Craft Tutorial: Homemade Notepad from Recycled Paper

If you are like me, you take notes on everything, but it always seems like you never have a notepad around! I'm always thinking of new things to do or try, or making lists of things I need to do for my business. So, I decided to put together a quick and easy notepad for my desk out of old, used paper!

You will need:
-Used paper with one blank side
-Binder clips
-Elmer's glue
-Scissors


Cut up your used paper. I found that cutting the papers in fourths made for the most convenient notepads. Face all of the blank sides facing up.


Put your binder clips along one side of the stack of paper. 


Along where you placed your binder clips, pour a thick layer of glue.
Let the glue dry completely, then remove your binder clips and boom! You have a brand new, ready to use notepad! Super easy project that recycles old paper... love it!


Monday, May 20, 2013

So much for a slow summer...

My summer is off to a running start... I barely had time to catch my breath from a grueling finals week before I was staring in the face of three back to back craft shows. My next three weekends look like this:
Super secret new project!

May 25 - Mountain View Bulk Foods Spring Fling Show
Chucky, TN from 8am-7pm

June 1- Scott County Art Bazaar
Gate City, VA from 10am-6pm

June 7 - Boones Creek Day
Johnson City, TN from 9am-5pm

Fun times! I am actually enjoying keeping busy. It keeps me moving, rather than becoming slothy and stagnant over summer. I'm in full production mode, stocking up on 18 different flavors of lip balm (including 4 new ones that have not made their debut on Etsy yet). I'm also working on reformatting my bath bomb recipe. I love my round bath bombs. The shape is so classically bath bomb... But I am working on a new formula, which will help me create new shapes, like hearts and flowers. The bath bombs will be bigger (yay!) and I'll be able to offer more fragrances.

I'm also working on a super secret new project... If I tell you, can you keep a secret? ;o) Ha! It's cupcake bath bombs! I am so excited about them... I am working on mini ones (like the photo above) and normal size ones. I'll be debuting them at my next craft show, so if you are in the East Tennessee area this Satuday, come down and see them!

So, I am headed back to the grind!
For homework, leave a comment below and let me know what new bath bomb scents you would like to see!

Monday, May 13, 2013

Milestone: 300 sales on Etsy!

On Sunday, I passed a huge milestone: my Etsy shop now boasts 300 sales! Wow! I am so excited and happy and thankful for all of the support from my customers, friends, and family.

So, in the spirit of giving back, I am holding another giveaway through Rafflecopter to give back to my awesome people! You can enter a chance to win 3 lip balms (your choice of flavors)!

a Rafflecopter giveaway
Make sure to enter daily for your best chance to win! Winner will be announced on Monday, May 20!
Thank you all so much for your love, support, and kind words.

Tuesday, May 7, 2013

Tennessee Soap and Candle Social 2013

This past weekend, I was lucky enough to be able to attend the Tennessee Soap and Candle Social in Nashville, TN! I got to rub elbows with some amazingly talented soap makers and candle makers, I got some amazing swag, and I learned loads from the guest speakers!

I thought I would take a few minutes and talk about the amazing speakers, and later this week, I am going to make a YouTube video of all of my swag and goodies from the social.

So... On to the lectures!

We started off our day with Lela Barker of Lucky Break Consulting and her "Dont lose your ass donkey" talk! Barker talked to us from a business standpoint, talking about pricing our products and not forgetting things like labor costs and overhead. She broke down Cost of Goods Sold for us, and gave us simple equations to use to make sure that we dont lose our asses donkeys! ;o)

Our second talk of the day was led by Kayla Fioravanti, and Kayla spoke to us about self publishing, which is something that I have been interested in for AGES! I have been a writer all my life, from poetry to fiction, and I've recently been inspired to start writing some nonfiction. I began researching self publishing back in March during my Spring Break, and I started on my first "How to" book shortly after... But Kayla really inspired me to kick that project into high gear! I purchased Kayla's book, How to Self-Publish: An Author-preneur's Guide to Publishing while at the Social, and I've already learned so much!! I highly recommend her book... Amazing information!!

And our third talk of the day was led by Donna Maria of the Indie Business Network, and Donna spoke to us about "The 5 Best Business Models for Handmade Entrepreneurs."Two that really spoke to me were "clubs and subscription boxes" and "teaching and information sharing." I've already got a soap of the month club, with a three month subscription and a six month subscription, but I have already been inspired to work with my local Etsy team on something bigger and better! And with teaching, I have always wanted to teach classes on soap making... Maybe that is something that I can work on in the future!

We also had some demonstrations by local artisans. The group was taught how to make Massage Candles, Felted Soap, and Shower Tarts, so there are loads of goodies that I cannot wait to try my hand at! :oD

I had such a wonderful time at this year's social! I cannot wait for next year!

I will try to have my YouTube video of my swag bag, my garage sale goodies, and the door prizes that I won this week. Keep an eye out for it!

Friday, April 26, 2013

Featured Post: Pam of PeeGeeJewelry

Meet Pam of PeeGeeJewelry! Pam makes fun and funky jewelry that I absolutely adore! Learn more about Pam below...
_____
I am Pam George and I sell Country Girl, Gypsy Chic jewelry with a kick of Vintage Boho. I round it out with Shabby Chic!

I am an art quilter at heart, but I love to make jewelry when I'm not quilting. Now the jewelry has seem to taken over. Although I do have a quilt going usually at the same time.

I love to work with cold porcelain and air dry clay. I tend to get inspired by nature and vintage things. I love to create plants and flowers and work a lot with my photography for inspiration.

Right now I have been making vintage camping trailers that I have cut from steel. I paint each one to have it's own retro feel. I hope to create custom pendants for people who "Glamp" , thats glamorous camping. I also would like to reach out to the vintage campers.

I have a Face Book page called PeeGee Jewelry at www.facebook.com/PeeGeeJewelry and I share a blog with my daughter called Family Style Living at Wordpress. familystyleliving.wordpress.com/
We are both DIY girls and I talk about my quilting and jewelry on the blog quite frequently. We share all our decorating projects and cooking and gardening ideas. Life is great!

Monday, April 22, 2013

3 weeks and one final exam to go...

It's finally getting closer and closer to summer break, and I am looking forward to it more than ever! I have so many ideas and plans in my head... But first, I have to get through two end of the year projects, one 10+ page research paper, and one killer final exam. Three more weeks and counting!

I spent last weekend at Tusculum College attending the Old Oak Festival. It was a blast! I was there with a bunch of my friends from Etsy, including PinkMouse, SSBaud, ChickenCoopStamper, JaneyLaughs, JerisJewels, and W.E.Creationz. We had a blast through the cold and the rain, and I got to meet some great people and had a bit of fun as well!

This coming weekend, I am looking forward to heading to the Spring Craft Show at the Boones Creek Baptist Family Life Center in Johnson City, TN! This show is being thrown by my friend Cathi at SistersActTwo, and more of my Etsy people will be attending!

I am planning on bringing my soaps and lip balms, as well as new products like whipped body butters in 5 scents, water-based body sprays, and scented bath salts! I am featuring new scents in soap, as well as classics like lavender, vanilla, and sandalwood.

I will be at the show on Saturday, April 27 from 9-4! Come out and see me!

Only three weeks left until I can kick my shop back into high gear... Stick with me, readers! The blog drought is coming to an end soon!

Friday, April 12, 2013

Feature Friday: Eric and Dustin of KnitsbyED

Eric  and Dustin of Knits by ED features fun knit toys along with a sampling of gorgeous vintage finds. Learn more about him below:
_____
1.Who are you and what do you sell?

We are Knits by ED; a small town business, producing hand-knit plushies and home décor made from recycled materials. We can recycle any blankets, clothes, knitted items, and even plastic bags. The items are cut into strips (or in the case of knitted items they are simply unraveled) and attached at the ends to create yarn; then we can turn that yarn into unique creations and critters.

2.What inspired you to get started in your craft?

We got a lot of our inspiration from our childhood memories with stuffed plushies, Beanie Babies, and the like. But we really wanted to start our business to help save our environment. Most of the materials used to make our items are recycled. We wanted to turn plastic bags, old sweaters and other knitted items, and even old t-shirts into something useful and memorable instead of them ending up hidden in the back of the closet, or stored away forever in the garage, or even worse, littering our precious Earth.

3.What is your favorite part of your process?

Our favorite part of our craft is seeing the joy that one Knits by Ed creation can bring to a person and knowing that we’re helping the environment in the process.

4.Handmade: What inspires you the most while you create?

We gain a lot of inspiration from nature and animals. We have two cats running around at home plus multiple aquatic critters. Whether it’s from the sea, the sky, or land, all of Earth’s creatures are beautiful and deserve to be recognized and kept safe.

5.If you could pick, what is your most favorite item in your Etsy shop?

Our favorite items to create are the octopi. We love them all too much to pick just one, though!

6.Got any social media links?

Please like us at www.facebook.com/knitsbyed.

7.Anything else that you want to share?

10% of all sales from Knits by Ed are donated to Oceana to help maintain our oceans. We’re just two guys running a small business in a very small town but we believe that everyone can make a difference when it comes to keeping our planet clean and beautiful!

Friday, April 5, 2013

Feature Friday: Lisa of W.E.Creationz

Meet Lisa, of W.E.Creationz fame! You may know her from her bright and fun creations, or you may know her from her colorful, happy presence at craft shows, or you may know her from her Zulily.com fame! Learn more about her below!
_____


1.Who are you and what do you sell? wecreationz....anything and everything shabby chic and for children!!!! I love creating for children and it needs to be things you can't really find any where else!

2.What inspired you to get started in your craft? I have sewn all my life, I make my own patterns, and when grandchildren started coming along I realized this was the funniest stuff of all to make!!!!!

3.What is your favorite part of your process? Going from a pile of fabric, ribbon and trims to all dolled up kids at a photo shoot. I guess I love the entire process!!!

4.Handmade: What inspires you the most while you create? The love for my grand babies and just how special and cute these little people are in our lives! :)

5.If you could pick, what is your most favorite item in your Etsy shop? My new "Emmelia Grace" set

6.Got any social media links? 
www.wecreationz.blogspot.com
W.E.Creationz on facebook
wecreationz on twitter

7.Anything else that you want to share? Being able to create with your hands are sew gratifying but being able to do this and make your little pint sixed customers and their parents happy is even better!!!!!!